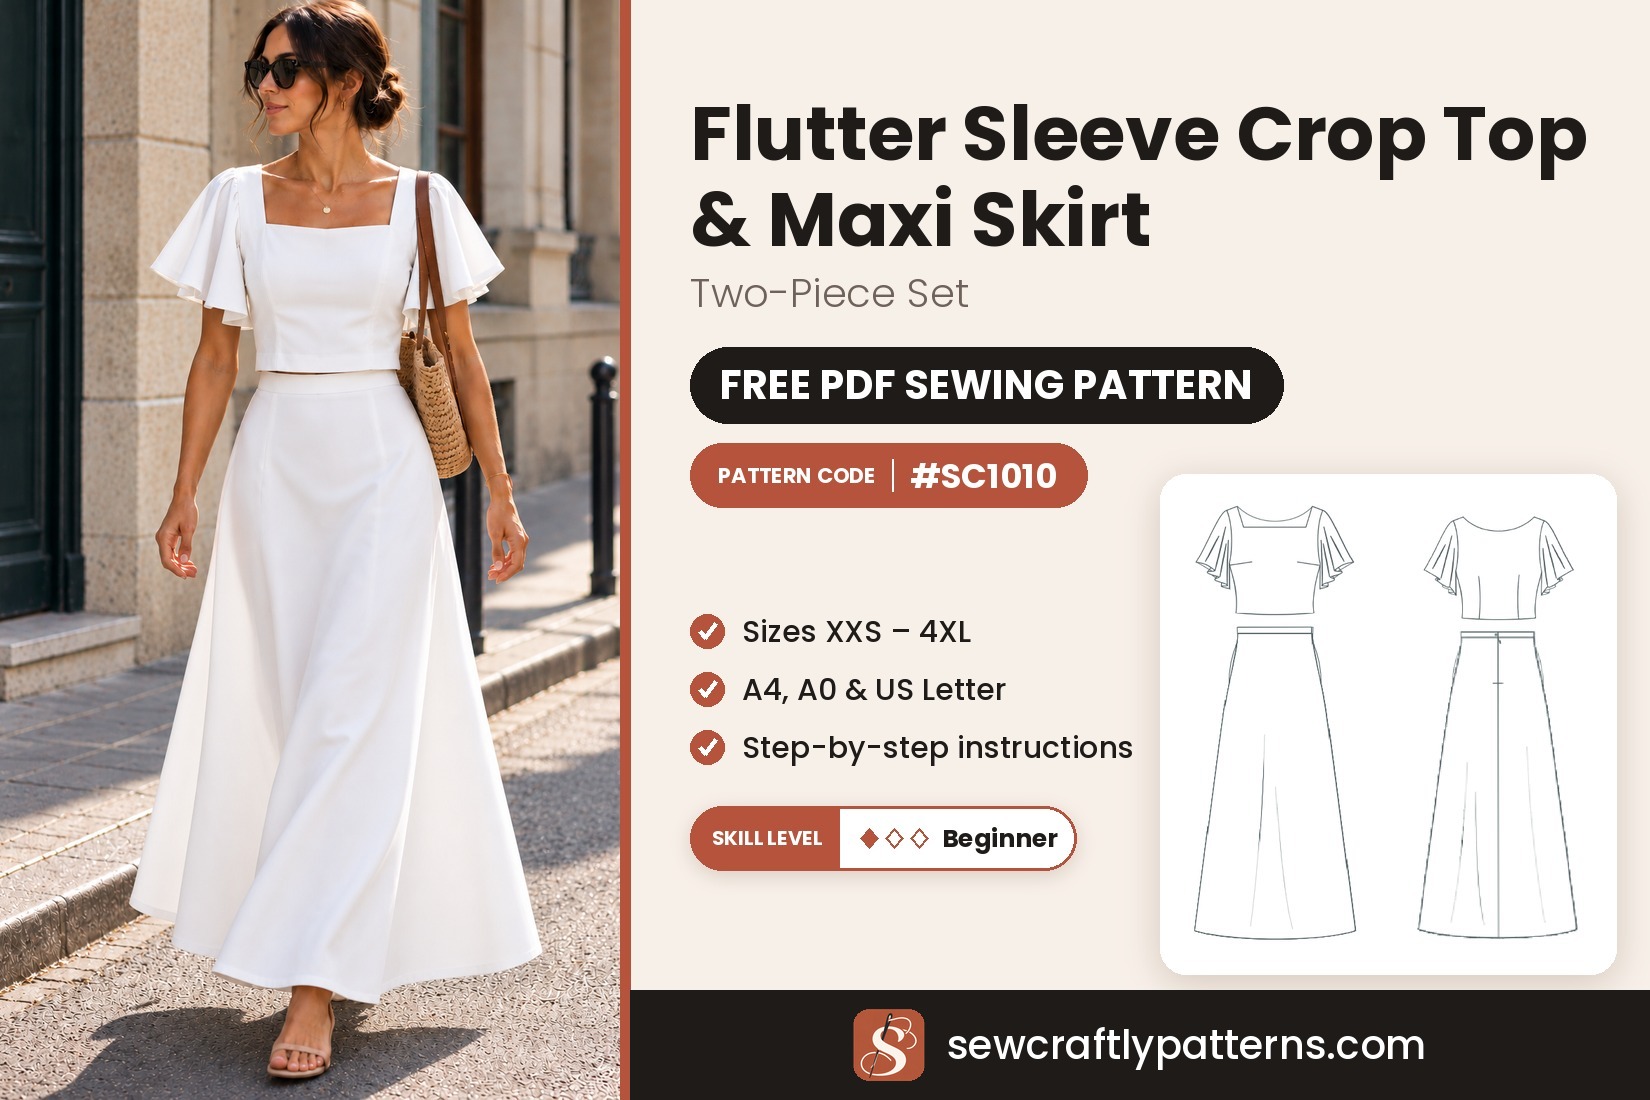
Garment Cropped top and maxi skirt
Level Easy (confident beginner)
Sizes XXS – 4XL
Fabric Light to medium woven
Pieces 7 (3 top, 4 skirt)
The Selma is an easy, breezy summer two-piece: a cropped top with a square neckline and soft flutter sleeves, and a high-waisted A-line maxi skirt with pockets. The top is shaped with bust and back darts and closes with an invisible zipper in the side seam, while the skirt flows from a straight waistband into a long, swishy hem. Sew them together as a set, or wear each piece on its own with your wardrobe basics.
This free two piece set sewing pattern is made for light to medium-weight woven fabrics with a soft drape, such as linen, a linen-viscose blend or viscose challis. You get one PDF file per size for the top and one for the skirt, so you can choose a different size for each piece. The necklines are finished with a self-fabric bias facing, the sleeves are set in and left loose and fluttery at the hem, and the pockets are hidden in the side seams of the skirt.
Materials
- Main fabric: 3.2 to 3.6 m (3 1/2 to 4 yd) of 150 cm wide light- to medium-weight woven with a soft drape: linen or a linen-viscose blend, viscose or rayon challis, or cotton lawn, voile or light poplin (see the fabric table below)
- Pocket bags: 0.4 m (1/2 yd) of lining or cotton, 110 cm wide or more
- Fusible interfacing: 0.2 m (1/4 yd), 90 cm (36″) wide, for the waistband
- Invisible zippers: one for the top (23 or 30 cm, see the table) and one 20 cm (8″) zipper for the skirt, plus an invisible-zipper foot
- Bias tape: self-fabric bias strips 4 cm (1 5/8″) wide, pressed into 2 cm (3/4″) single-fold tape, or ready-made 2 cm single-fold bias tape, 95 to 110 cm depending on your size
- Button: 1 button, 1 cm (3/8″), for the skirt waistband (or a hook and eye)
- Matching all-purpose thread
Pattern pieces
- Top front, main fabric: cut 1, single layer, not on a fold
- Top back, main fabric: cut 1, single layer, not on a fold
- Top sleeve, main fabric: cut 2 (a mirrored pair)
- Bias strips, main fabric: 4 cm (1 5/8″) wide, cut at 45° to the selvedge
- Skirt front, main fabric: cut 1, single layer, not on a fold
- Skirt back, main fabric: cut 2 (a mirrored pair), centre back seam
- Skirt waistband, main fabric + fusible interfacing: cut 1 + 1, single layer
- Skirt pocket bag, lining: cut 4 (two mirrored pairs)
The top front, top back and skirt front are drawn whole, so lay them on a single layer of fabric. The word FOLD on the waistband marks the fold line along its length, it is not a cut-on-fold edge.
New to PDF patterns? Start here
Our free step-by-step guides take you from your measurements to a printed pattern:
- How to take your body measurements: what to measure and how, in 10 minutes.
- How to choose your size: which measurement to follow, and what to do between sizes.
- How to print and assemble your pattern: A4 or US Letter, the test box, and taping the pages.
Get the pattern
Free PDF pattern in A4 and US Letter, with one file per size (00 to 22) for the top and the skirt. Share your make with #sewcraftly!
Print page 1 at 100% and check that the test square measures 10 cm (4 in). New to PDF patterns? Read how to print and assemble a PDF pattern.
Printable sewing tutorial
Need help completing the project?
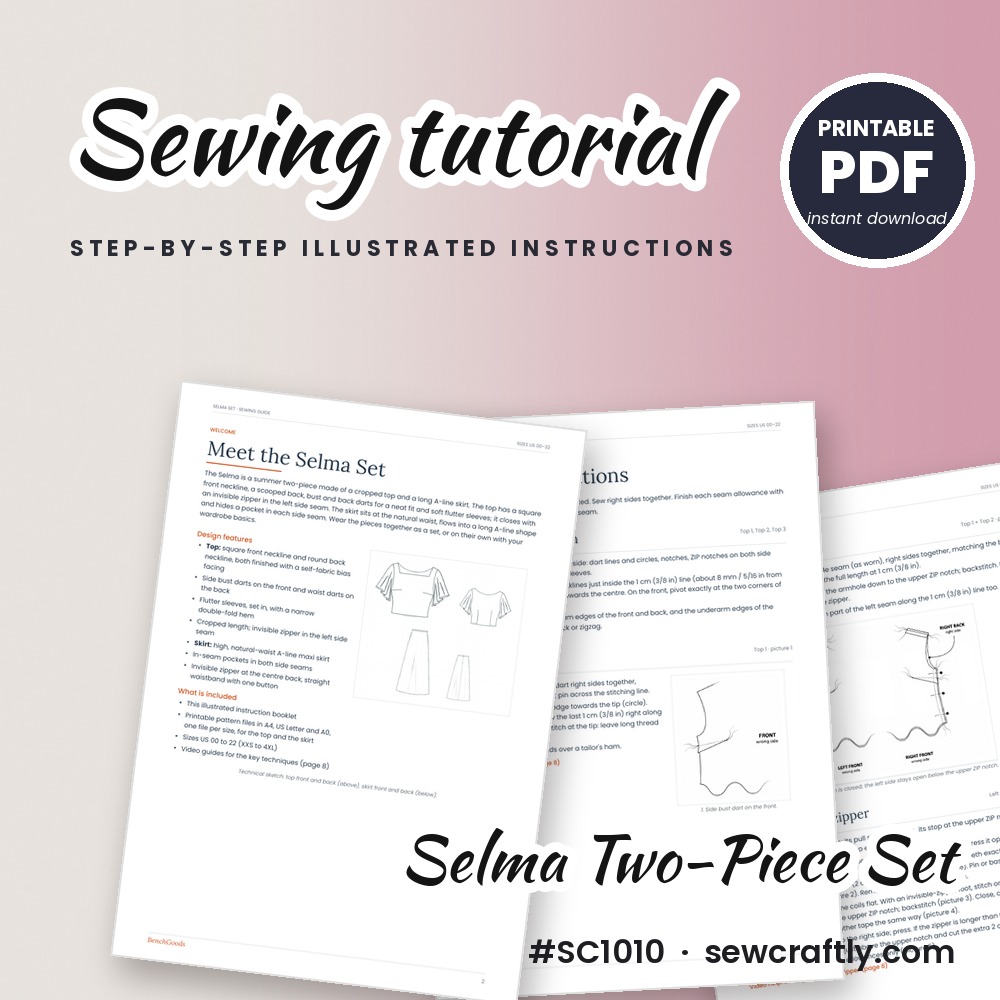
Get the full printable tutorial for the Selma set: detailed step-by-step sewing instructions with clear illustrations, line sketches, a sizing guide and the list of materials you need.
- Illustrated diagrams for every step
- Size charts, fabric, zipper and bias tape lengths per size
- Video guides for the key techniques, with links and QR codes
- Printable PDF, instant download
Design details and fit of the Selma set
The top is cropped and fitted, with about 7 cm (2 3/4″) of ease at the waist, a square front neckline and a scooped round back neckline. Side bust darts and back waist darts shape it close to the body, and the soft flutter sleeves are set in and finished with a narrow double-fold hem. It is about 43 cm (17″) long at the centre front and closes with an invisible zipper in the left side seam.
The skirt sits at the natural waist with a straight waistband that has about 1.5 cm (5/8″) of ease, closed with one button and an invisible zipper at the centre back. It flows into a long A-line shape of about 100 cm (39 1/2″), with an in-seam pocket in each side seam. Both pieces are drafted for a height of 167.75 cm (5′6″).
Difficulty and what to know before you start
The set is rated easy for a confident beginner. If you have sewn a simple top or a skirt with a zipper before, nothing here will be completely new. The trickiest steps are the square-neck bias facing (steps 5 and 6) and the two invisible zippers (steps 8 and 13), so read them through once before you start. The pattern is made for woven fabric: it is not suitable for knits.
Tools you will want: a sewing machine with an invisible-zipper foot, an overlocker or a zigzag stitch to finish the edges, a tailor’s ham for pressing the darts, an iron, pins or clips, and tailor’s chalk or a washable pen.
Sizing guide
Drafted for a height of 167.75 cm (5′6″). Choose the top by your bust and the skirt by your waist, and compare them with the body measurements below, not with your ready-to-wear size. You can sew a different size for each piece. Not sure? Read how to choose your size.
Letter sizes: 00/0 = XXS · 2/4 = XS · 6/8 = S · 10/12 = M · 14 = L · 16 = XL · 18 = XXL · 20 = 3XL · 22 = 4XL
Body measurements
| cm | 00 | 0 | 2 | 4 | 6 | 8 | 10 | 12 | 14 | 16 | 18 | 20 | 22 |
|---|---|---|---|---|---|---|---|---|---|---|---|---|---|
| Bust | 80 | 82.5 | 85 | 87.8 | 90.2 | 92.8 | 95.2 | 99.2 | 104.2 | 109.2 | 114.2 | 119.2 | 124.2 |
| Waist | 63.5 | 66 | 68.8 | 71.2 | 73.8 | 76.2 | 78.8 | 82.8 | 87.5 | 93.2 | 99 | 104.8 | 110.5 |
| Hips | 87.8 | 90.2 | 92.8 | 95.2 | 98 | 100.2 | 102.8 | 106.5 | 111 | 115.5 | 120.8 | 125.8 | 130.8 |
Finished garment measurements: top
| cm | 00 | 0 | 2 | 4 | 6 | 8 | 10 | 12 | 14 | 16 | 18 | 20 | 22 |
|---|---|---|---|---|---|---|---|---|---|---|---|---|---|
| Waist | 70.7 | 73.2 | 75.9 | 78.4 | 81 | 83.5 | 86.1 | 90.2 | 95 | 100.9 | 106.7 | 112.6 | 118.5 |
| Hem width | 81.8 | 84.3 | 87.1 | 89.9 | 92.8 | 95.6 | 98.3 | 102.5 | 107.5 | 113.1 | 118.6 | 124.2 | 129.7 |
| CF length to hem | 41.2 | 41.5 | 41.7 | 42 | 42.2 | 42.6 | 42.9 | 43.4 | 44.5 | 45.3 | 46.2 | 47.1 | 48.1 |
| Shoulder to hem | 47 | 47.4 | 47.8 | 48.2 | 48.5 | 48.9 | 49.6 | 50.4 | 51.7 | 52.6 | 53.9 | 54.9 | 56.1 |
| Sleeve length | 20.7 | 22.4 | 23.4 | 24 | 24.8 | 24.9 | 25.5 | 24.3 | 24.3 | 24.1 | 23.7 | 24 | 23.6 |
Waist and hem width are full circumferences. Finished measurements are taken on the pattern, without seam allowances. The top has about 7 cm (2 3/4″) of ease at the waist.
Finished garment measurements: skirt
| cm | 00 | 0 | 2 | 4 | 6 | 8 | 10 | 12 | 14 | 16 | 18 | 20 | 22 |
|---|---|---|---|---|---|---|---|---|---|---|---|---|---|
| Waist | 64.7 | 67.2 | 70 | 72.5 | 75.1 | 77.6 | 80.2 | 84.2 | 89.1 | 94.9 | 100.7 | 106.6 | 112.5 |
| Hem width | 219.1 | 220.8 | 221.6 | 224.8 | 228.7 | 231.2 | 233.9 | 238.7 | 242.2 | 243.2 | 246.1 | 248.5 | 251 |
| CF length (incl. waistband) | 104.4 | 104.1 | 104 | 103.8 | 103.6 | 103.5 | 103.2 | 104.1 | 104 | 103.9 | 103.7 | 103.8 | 103.9 |
Waist and hem width are full circumferences. The CF length includes the 3 cm (1 1/8″) waistband. The skirt waistband has about 1.5 cm (5/8″) of ease.
Zipper and bias tape length
| cm | 00 | 0 | 2 | 4 | 6 | 8 | 10 | 12 | 14 | 16 | 18 | 20 | 22 |
|---|---|---|---|---|---|---|---|---|---|---|---|---|---|
| Top zipper | 30 | 30 | 30 | 23 | 23 | 23 | 23 | 23 | 23 | 23 | 23 | 23 | 23 |
| Skirt zipper | 20 | 20 | 20 | 20 | 20 | 20 | 20 | 20 | 20 | 20 | 20 | 20 | 20 |
| Bias tape | 95 | 95 | 95 | 95 | 95 | 95 | 100 | 100 | 100 | 105 | 105 | 105 | 110 |
Zipper lengths are as drafted; a longer invisible zipper also works and is shortened (step 8). The bias tape length is the neckline length plus 15 cm for joins and corners.
Fabric requirements
| cm | US 00–6 | US 8–14 | US 16–22 |
|---|---|---|---|
| Top, 150 cm wide | 90 | 100 | 120 |
| Top, 115 cm wide | 120 | 120 | 180 |
| Skirt, 150 cm wide | 230 | 230 | 240 |
| Full set, 150 cm wide | 320 | 330 | 360 |
All pieces laid out on the grain, with the sleeves and the skirt backs as mirrored pairs, plus about 8 % for shrinkage and straightening. The skirt front is about 107–125 cm (42–49″) wide, so the skirt needs fabric 140–150 cm (55–60″) wide: 115 cm fabric is not suitable for the skirt. The neckline bias strips are cut from the leftovers.
Common fit adjustments
Length. Lengthen or shorten both pieces at the hem and keep the curve of the hem. If you shorten the top, keep the zipper opening (the ZIP notches) and shorten the zipper instead. The top is about 43 cm (17″) long at the centre front and the skirt about 100 cm (39 1/2″).
Between two sizes. Choose the top by your bust and the skirt by your waist, and mix sizes if you need to. See how to take your body measurements if you want to double-check.
Sewing notes
Fit & style
Choose the top by your bust and the skirt by your waist. Check the length against the finished CF lengths in the tables and change both pieces at the hem, keeping its curve.
Fabrics
Light- to medium-weight wovens with a soft drape: linen or a linen-viscose blend, viscose or rayon challis, or cotton lawn, voile or light poplin. Not suitable for knits.
Cutting & sewing
Follow the grainline arrow on every piece, parallel to the selvedge. Snip notches 3 mm (1/8″) into the seam allowance and mark circles and dart lines on the wrong side.
Choosing fabric for the Selma set
You want a woven with a soft drape: it lets the sleeves flutter and the long skirt swing. Linen or a linen-viscose blend gives a relaxed, textured summer set. Viscose or rayon challis drapes more fluidly, and cotton lawn, voile or a light poplin gives a crisper, cooler result. Very sheer fabrics may need a slip under the skirt.
Pre-wash and dry your fabric the way you will wash the finished set, because linen and cotton can shrink 3 to 5 %. Linen frays easily, so finish every raw edge (overlocker or zigzag) as you go, staystitch the necklines and the skirt waist right after cutting, and press every seam with steam before you cross it with another seam.
Because the skirt front is so wide, the skirt needs fabric 140–150 cm (55–60″) wide. A 115 cm (45″) wide fabric works for the top only.
Sewing steps
Seam allowance is 1 cm (3/8″) unless stated. Sew right sides together, finish each seam allowance with an overlocker or a zigzag stitch and press after every seam. Steps 1 to 10 make the top and steps 11 to 15 make the skirt.
- Mark and staystitch. Transfer all markings to the wrong side: dart lines and circles, notches, the ZIP notches on both side seams and the ease circles on the sleeves. Staystitch the front and back necklines about 8 mm (5/16″) from the raw edge, from each shoulder towards the centre, pivoting exactly at the two corners of the square front neckline. Finish the shoulder and side seam edges of the front and back, and the underarm edges of the sleeves, separately.
- Sew the bust darts. Fold each side dart on the front right sides together, matching the two dart legs, and pin across the stitching line. Stitch from the side seam edge towards the tip (circle) with a backstitch at the start. Sew the last 1 cm (3/8″) right along the fold and do not backstitch at the tip: leave long thread tails and knot them. Press the darts downwards over a tailor’s ham.
- Sew the back darts. The back waist darts open at the hem. Fold each dart right sides together, matching the legs and the circles, and stitch from the hem edge up the marked line to the tip. Finish the tip like the bust darts, knotting the tails, and press the darts towards the centre back.
- Sew the shoulder seams. Pin the front to the back at the shoulders, right sides together, matching the neckline and armhole edges. Stitch at 1 cm (3/8″) and press the seam allowances open. They are already finished.
- Prepare the bias tape and the square corners. Cut bias strips 4 cm (1 5/8″) wide and join them with diagonal seams to the length in the zipper and bias tape table. Press both long edges to the centre to make 2 cm (3/4″) single-fold tape; ready-made tape works the same way. Cut it into a long piece for the back neckline and the two front sides, and a short piece for the bottom edge of the square, each 5 cm (2″) longer than the edge it covers. At each front corner, clip into the seam allowance exactly to the staystitching. The short piece is stitched from corner dot to corner dot, and the long piece reaches each corner dot from the side. At every corner, stop exactly at the dot, backstitch and leave a 2.5 cm (1″) tail free.
- Sew the bias facing. Open one fold of the tape and, right sides together, place the crease of the opened fold on the 1 cm (3/8″) line of the neckline. Start the long piece at the centre back, leaving a 5 cm (2″) tail, and stitch in the crease around the back neckline and down the front side to the corner dot. Repeat for the other half. Bring the two tails together at the centre back, mark where they meet, stitch them together on the marks, trim to 6 mm (1/4″), press open and sew the last bit of tape to the neckline. Stitch the short piece along the bottom edge of the square, from corner dot to corner dot. Press the tape up, away from the top, and understitch it to the seam allowances close to the seam from corner to corner, leaving the tails free. Trim the seam allowance to 5 mm (3/16″) and clip the back curve. Turn the tape completely to the inside so it does not show from the right side and press. At each corner cut one tail level with the edge and fold the other tail under so it covers the first one. Edgestitch the tape close to its inner fold all around the neckline and press.
- Sew the side seams. Pin the front to the back at the right side seam (as worn), right sides together, matching the bust darts and the armhole notches, and stitch the full length at 1 cm (3/8″). On the left side seam, stitch only from the armhole down to the upper ZIP notch and backstitch: below the notch the seam stays open for the zipper. Press the seams open, and press the open part of the left seam along the 1 cm (3/8″) line too.
- Insert the invisible side zipper. The zipper opens from the hem: its pull sits at the hem and its stop at the upper ZIP notch. Baste the open part of the left side seam closed at 1 cm (3/8″) and press it open. With the zipper closed, place it face down on the seam allowances, teeth exactly on the seam line and the pull end at the hem fold line (2 cm / 3/4″ above the raw edge). Pin or baste the tapes to the seam allowances only, then remove the basting of the seam. Open the zipper, press the coils flat and, with an invisible-zipper foot, stitch one tape close to the teeth from the hem up to the upper ZIP notch, backstitching at the end. Close the zipper, check that it is level, open it again and stitch the other tape the same way. Turn to the right side and press. If the zipper is longer than the opening, sew a few hand stitches over the coil just above the upper notch and cut off the extra 2 cm (3/4″) above. Stitch the tape ends to the seam allowances only.
- Make and set in the sleeves. Easestitch the sleeve cap between the two circles with two rows of long machine stitches, 5 mm and 8 mm (3/16″ and 5/16″) from the edge, leaving long thread tails. Fold the sleeve right sides together, stitch the underarm seam at 1 cm (3/8″) and press it open. Hem the flutter edge with a 2 cm (3/4″) double-fold hem: press 5 mm (3/16″) to the wrong side, then 1.5 cm (5/8″), ease the fullness on the curve with the iron, pin and stitch close to the inner fold. Turn the top inside out and keep the sleeve right side out. Slip the sleeve into the armhole, right sides together, matching the underarm seams, the single notch to the front, the double notch to the back and the top notch to the shoulder seam. Pull the easestitching threads until the cap fits without pleats, pin and stitch at 1 cm (3/8″) with the sleeve side up. Finish the two allowances together and press them towards the top.
- Hem the top. Try the top on and check the length. Press 5 mm (3/16″) to the wrong side all around the hem, then 1.5 cm (5/8″) more to make a 2 cm (3/4″) hem. At the zipper, fold the hem over the zipper tape ends so the pull sits right at the folded edge and hand-stitch the hem edges to the zipper tape. Stitch close to the inner fold all around and press.
- Prepare the skirt. Fuse the interfacing to the whole wrong side of the waistband. Transfer the markings: the pocket circles on the side seams of the front, the backs and the pocket bags, the zipper notch at the centre back, and the waistband lines, button circle and buttonhole. Staystitch the skirt waist 8 mm (5/16″) from the edge so it does not stretch. Finish the side seam edges of the front and backs, the centre back edges and the curved edges of the pocket bags.
- Add the pockets and sew the side seams. Pin a pocket bag to each side seam of the front and of each back, right sides together, matching the circles, and stitch at 1 cm (3/8″). Press the bags outwards with the seam allowances towards the bags, then understitch through the bag and both allowances 3 mm (1/8″) from the seam so the bag will not show. Pin the front to the backs at the side seams, right sides together, with the pockets matched. Stitch from the waist down to the upper circle, pivot, stitch around the pocket bags to the lower circle, pivot and continue to the hem. Clip the back seam allowance just above and below the pocket so it lies flat. Press the side seams open above and below the pocket, and press the pocket towards the centre front.
- Insert the invisible back zipper. Open the zipper and press the coils flat from the wrong side. On the right side of one back piece, place the open zipper face down with the top of the tape level with the waist edge and the teeth on the 1 cm (3/8″) line, and pin. With an invisible-zipper foot, stitch close to the teeth from the waist down until the foot meets the pull and backstitch. Close the zipper, pin the other tape to the other back piece level with the first, open it and stitch it the same way. Close the zipper, turn to the right side, check it and press. With the wrong side out again, pin the two backs together below the zipper. Starting slightly above and 2 mm (1/16″) to the left of the last zipper stitch, stitch the rest of the centre back seam down to the hem at 1 cm (3/8″). Press it open and stitch the lower tape ends to the seam allowances only.
- Attach the waistband and the button. Press 1 cm (3/8″) to the wrong side along the long edge of the waistband that will go to the inside. Right sides together, pin the other long edge to the skirt waist, matching the CENTER FRONT and SIDE SEAM lines to the skirt seams and the notches to the waist notches. The plain end lines up with one zipper edge plus the 1 cm (3/8″) seam allowance, and the end with the button circle extends 3 cm (1 1/8″) past the other zipper edge. Stitch at 1 cm (3/8″), trim to 6 mm (1/4″) and press towards the waistband. Fold the waistband along the FOLD line, right sides together, and stitch across each end at 1 cm (3/8″); on the extension end, stitch the end and along the bottom of the extension up to the zipper. Trim the corners, turn the waistband right side out and press. The pressed edge just covers the seam on the inside: slipstitch it by hand, or stitch in the ditch from the right side, and topstitch if you like. Make a 1.2 cm (1/2″) buttonhole on the marked line at the plain end and sew the 1 cm (3/8″) button on the circle of the extension. A hook and eye works too.
- Hem the skirt. Let the skirt hang for 24 hours, because the bias parts of an A-line skirt can drop. Try it on with your shoes and level the hem if needed. Run a long machine stitch 1.5 cm (5/8″) from the edge to help ease the curve, then press 5 mm (3/16″) to the wrong side and 1.5 cm (5/8″) more, easing the fullness with the iron. Stitch close to the inner fold all around and press. Give the whole set a final press with steam and a press cloth.
Tips and common mistakes
Staystitch straight after cutting. The necklines and the skirt waist are curved or cut partly on the bias, so staystitch them before you handle the pieces and they will keep their shape.
Clip the square corners exactly to the stitching. At each front corner, clip into the seam allowance exactly to the staystitching and stop the tape at the corner dot. A clip that stops short leaves a pucker at the corner.
Do not backstitch the dart tips. Leave long thread tails and knot them, and sew the last 1 cm (3/8″) right along the fold so the dart ends smoothly.
Press with steam before you cross a seam. Linen loves steam, and a seam that is pressed flat before it is crossed by another one gives a much neater result.
Use an invisible-zipper foot and press the coils flat. Stitch as close to the teeth as you can, and check that the zipper is level before you close the rest of the seam.
Let the skirt hang for 24 hours before you hem it. The bias parts of an A-line skirt can drop, so try it on with your shoes and level the hem afterwards.
Variations to try
One print or two colours. Sew the whole set in a print, or the top and the skirt in two colours that you can mix and match.
Each piece on its own. The top and the skirt are separate patterns, so you can sew just the piece you need and wear it with your wardrobe basics.
Hook and eye. If you prefer, close the skirt waistband with a hook and eye instead of a button.
How to style the Selma set
Summer days: wear the set together with flat sandals and a straw bag.
Mix and match: pair the top with high-waisted jeans or wide trousers, such as our wide leg pants sewing pattern.
Cooler days: tuck a fitted tee or a bodysuit into the skirt.
Care
Follow the care instructions of your fabric and pre-wash it the same way before cutting. As a guide, wash at 30 °C (86 °F) on a gentle cycle, inside out and with the zippers closed. Line dry and press while slightly damp, because linen loves steam. Do not tumble dry linen or viscose.
Questions
Is seam allowance included?
Yes: 1 cm (3/8″) on every edge, including the necklines and the waistband, and a 2 cm (3/4″) hem on the top, the sleeves and the skirt.
Which paper sizes are included?
The free download comes in A4 and US Letter, with one file per size from 00 to 22 for the top and one for the skirt.
Which size should I choose?
Choose the top by your bust and the skirt by your waist, using the body measurements in the table and not your ready-to-wear size. You can sew a different size for each piece.
What fabric do I need?
A light- to medium-weight woven with a soft drape, such as linen or a linen-viscose blend, viscose or rayon challis, or cotton lawn, voile or light poplin. Knits are not suitable.
How much fabric do I need?
For the full set you need about 3.2 to 3.6 m of 150 cm wide fabric, depending on your size, plus 0.4 m of lining or cotton for the pocket bags and 0.2 m of fusible interfacing. The skirt front is wide, so 115 cm wide fabric only works for the top.
Which zippers do I need?
Two invisible zippers: one for the left side seam of the top (23 or 30 cm depending on your size, see the table) and one 20 cm zipper for the centre back of the skirt. A longer invisible zipper also works and is shortened.
Can I make only the top or only the skirt?
Yes. The top and the skirt have their own pattern files and their own steps, so you can sew either piece on its own.
How do I lengthen or shorten the set?
The pattern is drafted for a height of 167.75 cm (5′6″). Lengthen or shorten both pieces at the hem and keep the curve of the hem. If you shorten the top, keep the zipper opening (the ZIP notches) and shorten the zipper instead.
Is this set good for beginners?
It is rated easy for a confident beginner. The trickiest steps are the square-neck bias facing (steps 5 and 6) and the two invisible zippers (steps 8 and 13), so read them through once before you start.
Why should I let the skirt hang before hemming?
Parts of an A-line skirt are cut on the bias and can drop under their own weight. Hanging it for 24 hours lets the fabric settle, so your hem stays even.
Happy sewing!
Love our free patterns? Buy us a coffee to keep them coming, or simply share, pin and comment. Thank you!
 Support me on Ko-fi
Keep sewing