Garment Wide leg pants
Level Beginner
Sizes XXS – 4XL
Fabric Stretch knit
Pieces 4 (+ optional pocket)
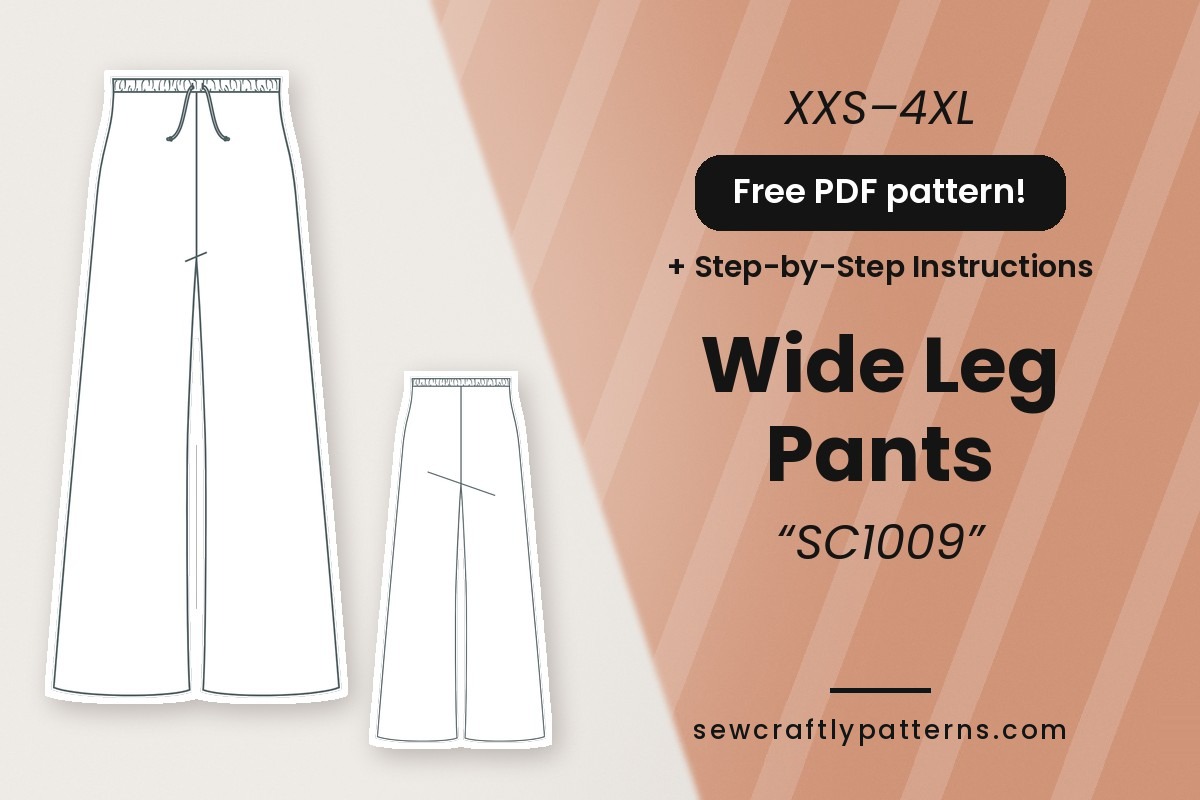
These wide leg pants are the easy pair you will reach for all week: a long, swishy leg that flares gently to the hem, a comfortable high-rise elastic waistband and a little tie at the front. There are no darts and no zipper, just a front leg, a back leg and a waistband, so they come together in an afternoon and make a great first pants project in knit fabric.
This free wide leg pants sewing pattern is made for stretch knits, which is what makes it so comfortable to wear. The waistband is folded into a casing with elastic all the way round, and a cord comes out through two eyelets at the centre front for a casual drawstring look. If you like pockets, there is an optional in-seam pocket you can add to each side seam. Make them in a linen-look jersey for summer, a viscose crepe knit for a fluid drape, or a soft ponte for a more structured leg, and wear them with a fitted tank, a cropped tee or an oversized shirt.
Materials
- Main fabric: 2.0 to 2.1 m (2 1/8 to 2 3/8 yd) of 150 cm wide medium-weight stretch knit with at least 20 % crosswise stretch: linen-look or slub jersey, viscose or modal crepe knit, or soft ponte (see the fabric table below)
- Elastic: 3.3 cm (1 1/4″) wide, length per size in the table below
- Cord or flat tape: 5 mm (3/16″) thick at most, length per size below
- 2 metal eyelets, 7 mm (1/4″) inner diameter, with their setting tool (or 2 small buttonholes instead)
- Lightweight fusible interfacing: a small piece, about 12 × 6 cm (5 × 2 1/2″)
- Ballpoint or stretch needle, matching polyester thread, a safety pin or bodkin; a twin stretch needle for the hem is optional
- Optional pockets: 0.3 m (3/8 yd) of main fabric or a stable cotton, and 2 strips of fusible stay tape, 2 × 17 cm (3/4 × 6 3/4″)
Pattern pieces
- Pants front, main fabric: cut 2 (mirrored pair)
- Pants back, main fabric: cut 2 (mirrored pair)
- Waistband (sizes 00–16), main fabric: cut 1, single layer, stretch along the length
- Waistband front + back (sizes 18–22), main fabric: cut 1 of each
- Waistband interfacing, fusible interfacing: cut 1
- Pocket bag (optional), main fabric or stable cotton: cut 4 (2 mirrored pairs)
The waistband is cut whole in a single layer. The word FOLD on it marks the fold line through the middle, it is not a cut-on-fold edge.
New to PDF patterns? Start here
Our free step-by-step guides take you from your measurements to a printed pattern:
- How to take your body measurements: what to measure and how, in 10 minutes.
- How to choose your size: which measurement to follow, and what to do between sizes.
- How to print and assemble your pattern: A4 or US Letter, the test box, and taping the pages.
Get the pattern
Free PDF pattern in A4 and US Letter, with one file per size (00 to 22). Share your make with #sewcraftly!
Print page 1 at 100% and check that the test square measures 10 cm (4 in). New to PDF patterns? Read how to print and assemble a PDF pattern.
Printable sewing tutorial
Need help completing the project?
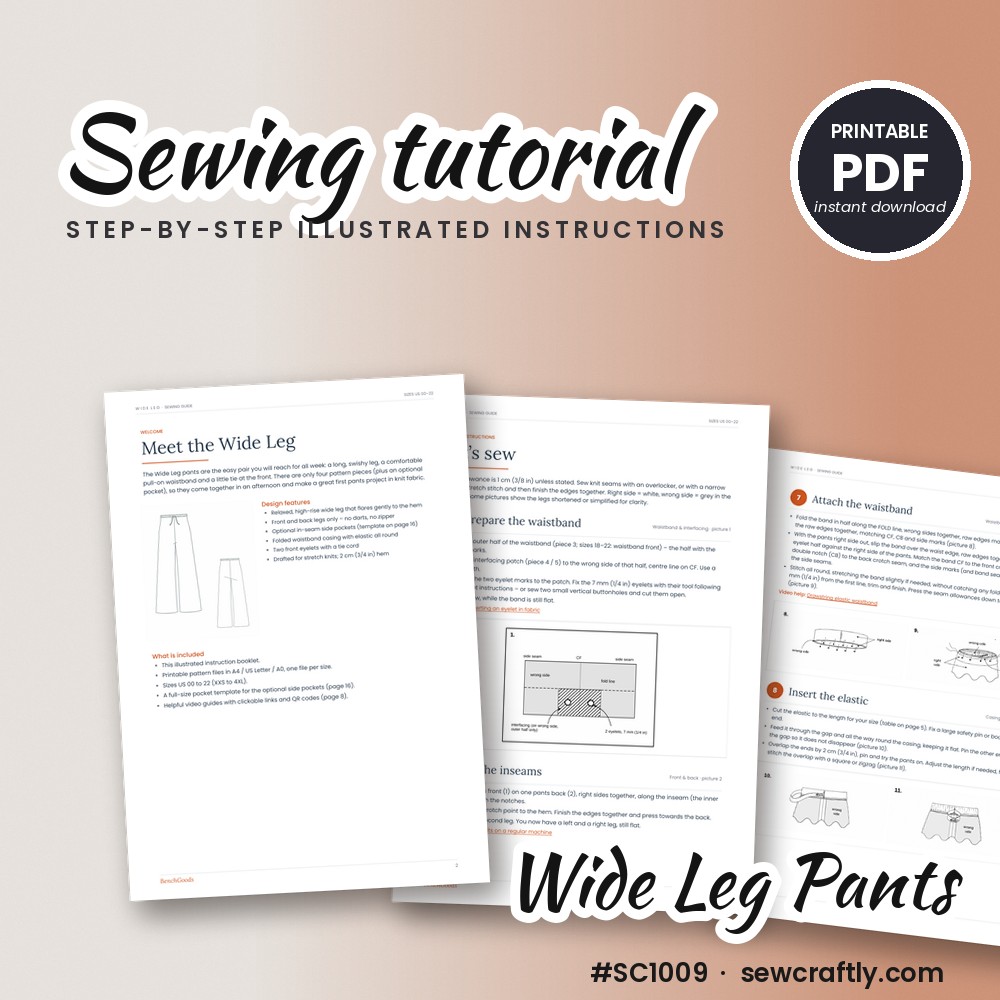
Get the full printable tutorial for these pants: detailed step-by-step sewing instructions with clear illustrations, line sketches, a sizing guide and the list of materials you need.
- Illustrated diagrams for every step
- Sizing guide, fabric and elastic length per size
- Full-size template for the optional side pockets
- Printable PDF, instant download
Design details and fit of the wide leg pants
These are relaxed, high-rise pants with a leg that flares gently from the hip to the hem. The fit is loose by design: the finished hip measurement is about 5 cm bigger than the body hip measurement in the smallest sizes and about 10 cm bigger in the largest, so they skim the body instead of clinging to it. The waist is elastic, which means you choose your size by your hips and let the waistband do the rest.
The pattern has only a front leg and a back leg, with no darts and no zipper. A folded waistband makes a casing for the elastic all the way round, and two eyelets at the centre front let a tie cord come out for a neat bow. The legs are finished with a 2 cm (3/4″) hem, and the optional in-seam pockets are hidden in the side seams.
Difficulty and what you need to know about knits
The pants are rated beginner. If you have sewn a simple knit top or a pair of leggings, nothing here will be new. The trickiest part is the waistband with the elastic and the tie, so read steps 6 to 9 through once before you start. Because the waistband is slightly smaller than the hips and has to stretch over them, the pattern only works in a knit with at least 20 % crosswise stretch. A non-stretch woven will not fit.
Tools you will want: a sewing machine with a ballpoint or stretch needle (an overlocker is nice, but a narrow zigzag or stretch stitch works), an eyelet setting tool, a large safety pin or bodkin, an iron, pins or clips, and chalk or a washable marker.
Sizing guide
Drafted for a height of 167.75 cm (5′6″). Choose your size by your hips. If you are between two sizes, go by the hip: the elastic waist adjusts. Not sure? Read how to choose your size.
Letter sizes: 00/0 = XXS · 2/4 = XS · 6/8 = S · 10/12 = M · 14 = L · 16 = XL · 18 = XXL · 20 = 3XL · 22 = 4XL
Body measurements
| cm | 00 | 0 | 2 | 4 | 6 | 8 | 10 | 12 | 14 | 16 | 18 | 20 | 22 |
|---|---|---|---|---|---|---|---|---|---|---|---|---|---|
| Bust | 80 | 82.5 | 85 | 87.8 | 90.2 | 92.8 | 95.2 | 99.2 | 104.2 | 109.2 | 114.2 | 119.2 | 124.2 |
| Waist | 63.5 | 66 | 68.8 | 71.2 | 73.8 | 76.2 | 78.8 | 82.8 | 87.5 | 93.2 | 99 | 104.8 | 110.5 |
| Hips | 87.8 | 90.2 | 92.8 | 95.2 | 98 | 100.2 | 102.8 | 106.5 | 111 | 115.5 | 120.8 | 125.8 | 130.8 |
Finished garment measurements
| cm | 00 | 0 | 2 | 4 | 6 | 8 | 10 | 12 | 14 | 16 | 18 | 20 | 22 |
|---|---|---|---|---|---|---|---|---|---|---|---|---|---|
| Hips | 92.5 | 95.1 | 97.9 | 100.6 | 103.6 | 106.1 | 108.8 | 113 | 118.1 | 123.2 | 129.2 | 135 | 140.9 |
| Thigh | 64.4 | 66.3 | 68.2 | 70.2 | 72.4 | 74.3 | 76.3 | 79.3 | 82.7 | 86.3 | 90.3 | 94.2 | 98.1 |
| Knee | 70.7 | 72.6 | 74.6 | 76.6 | 78.8 | 80.7 | 82.7 | 85.6 | 89.2 | 92.7 | 96.8 | 100.6 | 104.5 |
| Hem width | 79.1 | 81.3 | 83.5 | 85.6 | 88 | 90 | 92.1 | 95.3 | 99.2 | 103 | 107.5 | 111.7 | 115.9 |
| Front rise | 25.8 | 26.1 | 26.5 | 27 | 27.3 | 27.6 | 28 | 28.5 | 29.1 | 29.7 | 30.3 | 30.8 | 31.4 |
| Back rise | 35.3 | 36 | 36.7 | 37.5 | 38.1 | 38.8 | 39.4 | 40.3 | 41.4 | 42.6 | 43.8 | 45.1 | 46.3 |
| Inseam | 57.7 | 57.4 | 57 | 56.7 | 56.4 | 56 | 55.7 | 55.2 | 54.6 | 54 | 53.3 | 52.7 | 52 |
| Side length | 83.8 | 83.8 | 83.8 | 83.9 | 83.9 | 83.9 | 84 | 84 | 84 | 84 | 84 | 84 | 83.9 |
Hips, thigh, knee and hem width are full circumferences. Side length is measured from the waist seam to the hem, without the 3.3 cm (1 1/4″) waistband.
Elastic and cord length
| cm | 00 | 0 | 2 | 4 | 6 | 8 | 10 | 12 | 14 | 16 | 18 | 20 | 22 |
|---|---|---|---|---|---|---|---|---|---|---|---|---|---|
| Elastic 3.3 cm wide | 53.2 | 55.2 | 57.4 | 59.4 | 61.4 | 63.4 | 65.4 | 68.6 | 72.4 | 77 | 81.6 | 86.2 | 90.8 |
| Cord | 92 | 94 | 95 | 96 | 98 | 99 | 100 | 102 | 105 | 108 | 111 | 113 | 116 |
You can also cut the elastic to your own waist measurement minus 10 to 15 %. Try the pants on before you stitch the elastic ends together.
Fabric requirements
| cm | US 00–6 | US 8–14 | US 16–22 |
|---|---|---|---|
| 150 cm wide | 200 | 210 | 210 |
| 115 cm wide | 210 | 210 | 320* |
Estimated for the largest size of each group, single layer, with about 8 % extra and without pockets. *The size 16 waistband is 117 cm long, which is longer than a 115 cm wide fabric, so use 150 cm wide fabric for sizes 16 and up.
Common fit adjustments
Length. The pants are drafted for a height of 167.75 cm (5′6″). To lengthen or shorten, cut each leg piece across between the crotch and the hem, spread or overlap the pieces evenly, and redraw the side seam and inseam smoothly. Do exactly the same amount on the front and the back.
Between two sizes. Choose by the hip measurement. Because the waist is elastic, a slightly different waist measurement is not a problem, and you can cut the elastic to your own waist. See how to take your body measurements if you want to double-check.
Width at the side seams. The pattern asks you to try the pants on after the side seams are sewn. This is the moment to take in or let out a little, before the waistband goes on.
Sewing notes
Fit & style
Pick your size by the hips. Check the length against the finished side length and inseam in the table above, and adjust front and back by the same amount.
Fabrics
Medium-weight knits with good drape and at least 20 % crosswise stretch: a linen-look or slub jersey, a viscose or modal crepe knit, or a soft ponte for a more structured leg.
Cutting & sewing
Lay the knit flat without stretching it, with the greatest stretch across the legs and along the waistband. Transfer the notches, CF, CB, side marks and the two eyelet positions before you sew.
Choosing fabric for wide leg pants
The leg is wide and swishy, so you want a knit that falls and moves rather than stands away from the body. A linen-look or slub jersey (for example a viscose and linen blend) gives a relaxed, textured summer pair. A viscose or modal crepe knit drapes more fluidly. A soft ponte keeps a more structured, almost tailored leg, and is a good choice if you want to dress the pants up for the office.
Check the stretch before you buy: stretch the fabric across the width and make sure it grows by at least 20 %. The waistband is a little smaller than your hips and must stretch over them, so a woven fabric, even a soft one, will not work.
Pre-wash the fabric the same way you will wash the finished pants, and let the cut pieces of drapey knits hang for a few hours before you sew. Drapey knits can grow, so it is also worth letting the finished pants hang before you hem them. If you choose a gingham, stripe or other pattern, think about where the lines will fall at the centre front and the side seams before you cut.
Sewing steps
Seam allowance is 1 cm (3/8″) unless stated. Sew knit seams with an overlocker, or with a narrow zigzag or stretch stitch and then finish the edges together. Use a ballpoint or stretch needle and do not pull the fabric while you sew: let the feed dogs move it.
- Prepare the waistband. Find the outer half of the waistband, the half with the eyelet marks. Fuse the interfacing patch to its wrong side with the centre line on CF, using a press cloth. Transfer the two eyelet marks, then set the 7 mm (1/4″) eyelets, or sew two small vertical buttonholes and cut them open. Do this while the band is still flat.
- Sew the inseams. Place a pants front on a pants back, right sides together, along the inseam and match the notches. Stitch from the crotch point to the hem, finish the edges together and press towards the back. Repeat for the second leg.
- Sew the crotch seam. Open both legs and place them right sides together, matching the front and back crotch edges and the inseams at the crotch point. Stitch the whole curve from the front waist to the back waist and backstitch at both ends. Add a second row 6 mm (1/4″) from the first inside the seam allowance, trim close to it and finish the edges.
- Add the side pockets (optional). Skip this step if you sew the pants without pockets. Mark the pocket notches on the side seams at 4 cm (1 5/8″) and 19 cm (7 1/2″) below the waist edge. Fuse a 2 cm (3/4″) strip of stay tape between the notches on the wrong side of each front side edge. Stitch a pocket bag to each side edge 6 mm (1/4″) from the edge, with the bag top 3 cm (1 1/8″) below the waist edge, and press it away from the leg. Repeat on the back with the mirrored bags. The full-size pocket template is in the printable tutorial.
- Sew the side seams. Place front and back right sides together along the side seams and match the waist, notches and hem. Without pockets, stitch from the waist to the hem. With pockets, stitch from the waist to the upper notch, pivot, stitch around the pocket bags 1 cm (3/8″) from their edges, pivot at the lower notch and continue to the hem. Clip the back seam allowance above and below the pocket, press the bags towards the front, finish the edges and press towards the back. Try the pants on now if you want to adjust the width.
- Close the waistband. For sizes 00 to 16, fold the band right sides together and stitch the two short ends; this seam sits at the left side seam. For sizes 18 to 22, sew the waistband front and back together at both short ends. In one of these seams, leave a 4 cm (1 1/2″) gap in the half without eyelets, starting 1 cm (3/8″) from the fold line, and backstitch on both sides of the gap. Press the seam allowances open.
- Attach the waistband. Fold the band in half along the FOLD line, wrong sides together, and pin or baste the raw edges, matching CF, CB and the side marks. With the pants right side out, slip the band over the waist edge, raw edges together, with the eyelet half against the right side of the pants. Match the band CF to the front crotch seam, the double notch (CB) to the back crotch seam, and the side marks and the band seam with the gap to the side seams. Stitch all round, stretching the band slightly if needed, then stitch again 6 mm (1/4″) from the first line, trim and finish. Press the seam allowances down towards the pants.
- Insert the elastic. Cut the elastic to the length for your size and fix a large safety pin or bodkin to one end. Feed it through the gap and all the way round the casing, keeping it flat, and pin the other end outside the gap so it does not disappear. Overlap the ends by 2 cm (3/4″), pin and try the pants on, adjust the length if needed, then stitch the overlap with a square or zigzag.
- Add the cord and close. Cut the cord in two equal pieces. With a safety pin, thread each piece in through one eyelet and push it inside the casing, on top of the elastic, towards the side seam on its side. Let the inner end pass the side seam by about 1 cm (3/8″) and spread the gathers evenly round the band. Slipstitch the gap closed, then stitch in the ditch of each side seam through all the layers of the band to hold the cord ends and stop the elastic from twisting. Knot or seal the free ends of the cord.
- Hem the legs. Let the pants hang for a few hours first, then check the length. Finish the raw edge if your knit frays or curls, turn up 2 cm (3/4″) to the wrong side along the hem line and press. Stitch from the right side with a twin stretch needle, or from the wrong side with a narrow zigzag, close to the raw edge. A coverstitch machine also works. Press.
Tips and common mistakes
Do the eyelets first. Set them while the waistband is still flat and interfaced, as step 1 says. Trying to fit an eyelet into a finished, gathered casing is much harder, and an eyelet set without interfacing will tear out of the knit. Test one on a scrap of the same fabric and interfacing first.
Do not stretch the knit while you sew. Let the feed dogs move the fabric and use a ballpoint or stretch needle with polyester thread. Stretching the seams as you go leaves wavy, rippled seams that will not press flat.
Press, do not slide. Use a low to medium iron and lift and lower it rather than sliding, so the knit does not grow. A press cloth also protects the fabric when you fuse the interfacing.
Keep the elastic flat. A twisted elastic is the most common waistband problem. Feed it through the casing keeping it flat, and stitch in the ditch of the side seams as step 9 describes so it cannot roll.
Hem last, after hanging. Drapey knits can drop several millimetres overnight. Hang the finished pants for a few hours before you turn up the hem, and hand baste it if your fabric does not hold a crease.
Variations to try
With or without pockets. The pants work perfectly well without pockets, which also saves fabric and a step. If you add them, the in-seam pockets stay hidden in the side seams.
Cropped length. Shorten both legs equally between the crotch and the hem for a cropped wide leg, and keep the 2 cm hem allowance. This is a self-drafted change and is not covered in the instructions.
Contrast cord. Use a cord or flat tape in a contrasting colour for the front tie, or one in the same colour as the fabric for a quieter look.
Gingham, stripes or solids. The wide leg shows off a bold check beautifully. Cut every piece in the same direction, and plan where the pattern will meet at the centre front and the side seams.
How to style the wide leg pants
Summer days: a fitted tank or a cropped tee and flat sandals or white sneakers. The high waist is flattering with a short top.
Travel and weekends: a knit cardigan or an oversized shirt. For a smarter layer on top, the button front jacket sewing pattern is a natural pair for wide leg trousers.
Office: a dark ponte version with a tucked-in blouse and low heels.
Care
Follow the care instructions of your fabric and pre-wash it the same way before cutting. As a guide, wash at 30 °C inside out, dry flat or hang, and avoid hot tumble drying. Press with a low to medium iron.
Questions
Is seam allowance included?
Yes: 1 cm (3/8″) on every edge and 2 cm (3/4″) at the hem.
Which paper sizes are included?
The free download comes in A4 and US Letter, with one file per size from 00 to 22.
What fabric do I need?
A medium-weight stretch knit with at least 20 % crosswise stretch, such as a linen-look jersey, a viscose or modal crepe knit, or a soft ponte. A non-stretch woven will not fit because the waistband has to stretch over your hips.
Which size should I choose?
Choose by your hip measurement. If you are between two sizes, go by the hip: the elastic waist adjusts. Compare the finished measurements in the table to see the ease.
How wide should the elastic be?
3.3 cm (1 1/4″) wide. The length depends on your size and is in the elastic table above, or use your waist measurement minus 10 to 15 %.
Can I sew them without eyelets?
Yes. You can sew two small vertical buttonholes and cut them open instead of setting metal eyelets. Do it on the interfaced waistband while it is flat.
Do the pants have pockets?
Pockets are optional. You can add in-seam side pockets at step 4, using the full-size pocket template that comes with the printable tutorial. The pants also look great without them.
How do I lengthen or shorten the pants?
The pattern is drafted for 167.75 cm (5′6″). Cut across each leg piece between the crotch and the hem, spread or overlap evenly, and redraw the side seam and inseam smoothly. Make the same change on the front and the back.
Are these pants good for beginners?
Yes, they are rated beginner. There are only four pattern pieces, no darts and no zipper. The waistband with the elastic and the tie is the trickiest part, so read steps 6 to 9 once before you start.
Why should I let the pants hang before hemming?
Drapey knits can grow under their own weight. Hanging the pants for a few hours first lets the fabric settle, so your hem stays even.
Happy sewing!
Love our free patterns? Buy us a coffee to keep them coming, or simply share, pin and comment. Thank you!
 Support me on Ko-fi
Keep sewing