Garment Fitted jacket
Level Confident beginner
Sizes XXS – 4XL
Fabric Wool / suiting / linen
Pieces 6
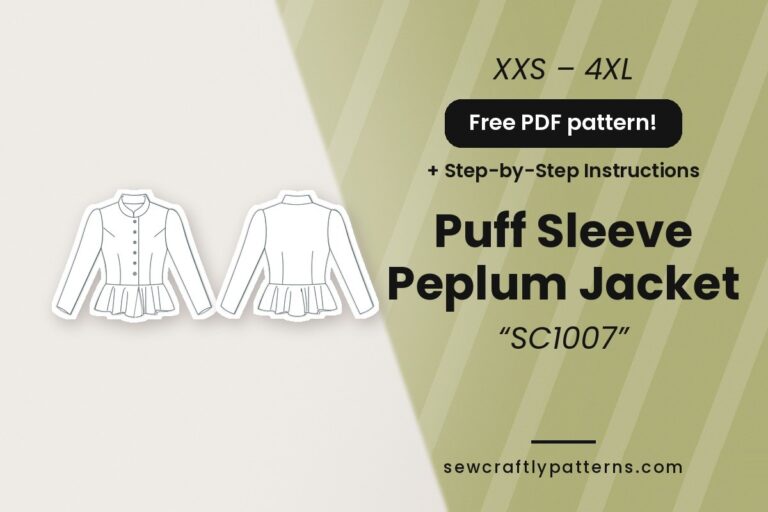
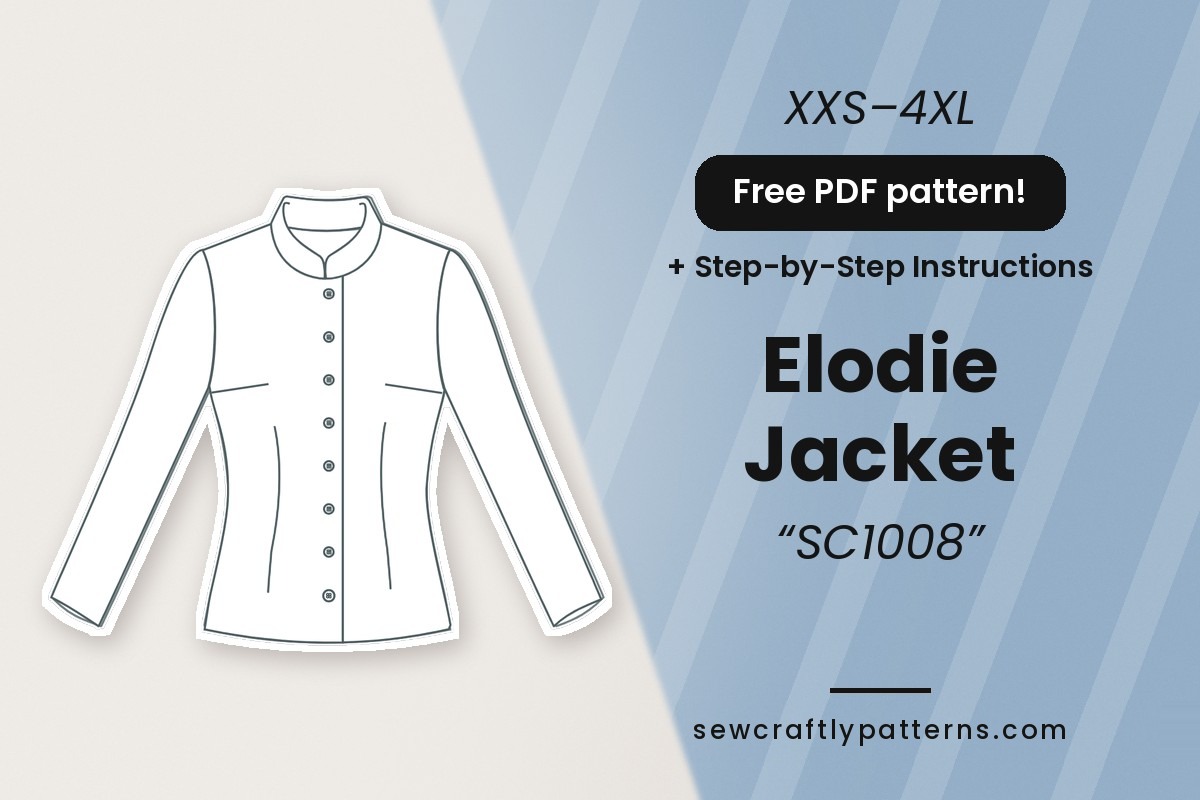
The Elodie is a neat, fitted jacket with a clean tailored look: a rounded stand collar, a long row of small buttons down the front, and bust, shoulder and waist darts that shape it close to the body. There are no lapels and no peplum, just a simple hip-length line with long set-in sleeves. Wear it buttoned up as a top with wide-leg trousers, or open over a blouse with jeans on a slow weekend.
This free fitted jacket sewing pattern is built for the days when a blazer feels too formal and a cardigan feels too casual. Elodie sits right in between: structured enough to look polished at work, soft enough to throw on with jeans. The shape comes from darts rather than seams, so the front stays smooth and uninterrupted, which makes it a lovely canvas for a beautiful wool or a textured linen. The little stand collar frames the face without the bulk of lapels, and the closely spaced buttons give it a quietly vintage, almost military rhythm. It suits anyone who likes clean lines and a defined waist, and because it is hip length, it works over high-waisted trousers, slim skirts and fuller midi skirts alike.
Materials
- Main fabric: 1.5 to 1.9 m (1 5/8 to 2 1/8 yd) of 150 cm wide medium-weight woven: wool crepe, gabardine or fine flannel, brushed stretch suiting, linen or cotton-linen twill
- Fusible interfacing: 0.8 to 0.9 m, lightweight, for the facings and collar stand
- Buttons: 8 buttons, 1 cm (3/8″) for sizes 00–14, 9 for sizes 16–22, plus a spare
- Matching all-purpose thread
- Optional: thin shoulder pads 0.5 cm
Fabrics with a nap or one-way design: add about 0.3 m (3/8 yd).
Pattern pieces
- Front, main fabric: cut 2 (mirrored pair)
- Back, main fabric: cut 1, single layer
- Sleeve, main fabric: cut 2 (mirrored pair)
- Front neck facing, main fabric + interfacing: cut 2 + 2
- Back neck facing, main fabric + interfacing: cut 1 + 1
- Collar stand, main fabric + interfacing: cut 2 + 2
Back, back facing and collar stand are whole pieces: cut them flat from a single layer, not on a fold.
New to PDF patterns? Start here
Our free step-by-step guides take you from your measurements to a printed pattern:
- How to take your body measurements: what to measure and how, in 10 minutes.
- How to choose your size: which measurement to follow, and what to do between sizes.
- How to print and assemble your pattern: A4 or US Letter, the test box, and taping the pages.
Get the pattern
Free PDF pattern in A4 and US Letter, with one file per size (00 to 22). Share your make with #sewcraftly!
Print page 1 at 100% and check that the test square measures 10 cm (4 in). New to PDF patterns? Read how to print and assemble a PDF pattern.
Printable sewing tutorial
Need help completing the project?
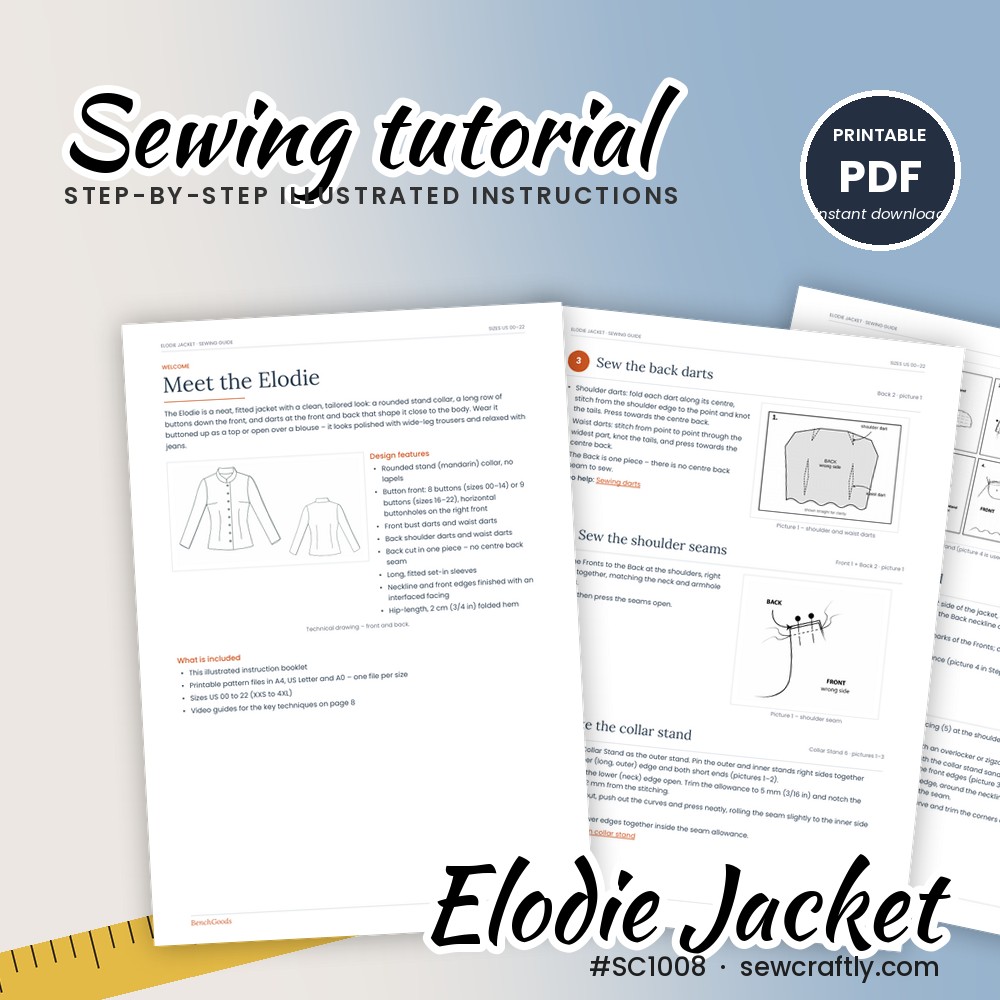
Get the full printable tutorial for this jacket: detailed step-by-step sewing instructions with clear illustrations, line sketches, a sizing guide and the list of materials you need.
- Illustrated diagrams for every step
- Sizing guide and fabric table per size
- Printable PDF, instant download
Design details and fit of the Elodie fitted jacket
Elodie is a close-fitting, unlined jacket that ends at the hip. It has about 5–7 cm of ease at the bust, which is enough to move your arms and wear a thin blouse or fine knit underneath, but not a chunky jumper. If you plan to layer heavier knits, think about sizing up rather than relying on the side seams.
All the shaping is done with darts: a bust dart and a waist dart on each front, and shoulder and waist darts on the back. This is what gives the jacket its neat, nipped-in line, and it also means fitting is very approachable, since each dart can be moved or deepened on its own. The front closes edge to edge with a long row of small 1 cm buttons, finished with a rounded stand collar and an interfaced facing instead of a lining.
The silhouette is particularly flattering if you want to show your waist without a peplum or belt. Shorter frames can wear it as is; taller sewists may want to check the body and sleeve length first (see the fit adjustments below).
Difficulty and sewing time
Elodie is rated confident beginner. If you have sewn a top with darts and set-in sleeves before, nothing here will be new; the collar stand and facing are the steps that need the most patience. As a rough guide, allow about 6–8 hours for a confident beginner, plus an evening for printing, taping and cutting. More experienced sewists will often be quicker.
Tools you will want: a sewing machine with a buttonhole foot, an overlocker or zigzag stitch for the seam finishes, an iron and a tailor’s ham for pressing the darts, chalk or a washable marker, pins or clips, and a point turner for the collar stand ends.
Sizing guide
Drafted for a height of 1.68 m (5′6″). The jacket is fitted, with about 5–7 cm of ease at the bust. Choose your size by bust, then adjust the waist at the side seams if needed. Not sure? Read how to choose your size.
Letter sizes: 00/0 = XXS · 2/4 = XS · 6/8 = S · 10/12 = M · 14 = L · 16 = XL · 18 = XXL · 20 = 3XL · 22 = 4XL
Body measurements
| cm | 00 | 0 | 2 | 4 | 6 | 8 | 10 | 12 | 14 | 16 | 18 | 20 | 22 |
|---|---|---|---|---|---|---|---|---|---|---|---|---|---|
| Bust | 80 | 82.5 | 85 | 87.8 | 90.2 | 92.8 | 95.2 | 99.2 | 104.2 | 109.2 | 114.2 | 119.2 | 124.2 |
| Waist | 63.5 | 66 | 68.8 | 71.2 | 73.8 | 76.2 | 78.8 | 82.8 | 87.5 | 93.2 | 99 | 104.8 | 110.5 |
| Hips | 87.8 | 90.2 | 92.8 | 95.2 | 98 | 100.2 | 102.8 | 106.5 | 111 | 115.5 | 120.8 | 125.8 | 130.8 |
Finished garment measurements
| cm | 00 | 0 | 2 | 4 | 6 | 8 | 10 | 12 | 14 | 16 | 18 | 20 | 22 |
|---|---|---|---|---|---|---|---|---|---|---|---|---|---|
| Bust | 85.5 | 88 | 90.5 | 93.2 | 95.8 | 98.2 | 100.8 | 104.8 | 109.9 | 115 | 120.1 | 125.2 | 130.3 |
| Waist | 67.7 | 70.2 | 72.9 | 75.4 | 78 | 80.5 | 83.1 | 87.2 | 92 | 97.9 | 103.7 | 109.6 | 115.5 |
| Hips | 93.2 | 95.8 | 98.7 | 101.9 | 105.5 | 108.9 | 112 | 116.2 | 120.9 | 126.4 | 131.8 | 137.5 | 142.7 |
| CB length | 63.6 | 64 | 64.7 | 64.8 | 64.9 | 64.9 | 65.2 | 65.1 | 65.5 | 65.9 | 66.6 | 67.4 | 67.9 |
| Sleeve length | 57.9 | 57.9 | 58 | 58 | 58 | 58.1 | 58.1 | 58.2 | 58.2 | 58.3 | 58.4 | 58.5 | 58.5 |
| Sleeve opening | 21.8 | 21.4 | 22.9 | 23.3 | 23.6 | 24.4 | 24.8 | 25.2 | 25.6 | 26 | 26.8 | 27.1 | 27.6 |
CB length is measured from the centre back neck seam to the hem; sleeve length from the shoulder point to the wrist.
Fabric requirements
| cm | 00 | 0 | 2 | 4 | 6 | 8 | 10 | 12 | 14 | 16 | 18 | 20 | 22 |
|---|---|---|---|---|---|---|---|---|---|---|---|---|---|
| 150 cm wide | 150 | 150 | 150 | 150 | 150 | 160 | 160 | 160 | 160 | 190 | 190 | 190 | 190 |
| 115 cm wide | 200 | 200 | 200 | 200 | 200 | 220 | 220 | 220 | 220 | 260 | 260 | 260 | 260 |
| Interfacing | 80 | 80 | 80 | 80 | 80 | 80 | 80 | 80 | 80 | 90 | 90 | 90 | 90 |
Calculated with the grainline straight, plus about 8 % for straightening and shrinkage.
Common fit adjustments
Sleeve length. The sleeve is long and slim, so measure from your shoulder point to your wrist and compare it with the finished sleeve length in the table above. Lengthen or shorten on the sleeve pattern, between the underarm and the hem, so the cap shape stays untouched.
Shoulder. With a fitted jacket, a too-wide shoulder shows quickly as a dent at the top of the sleeve. If you are between sizes at the shoulder, follow the smaller size there and blend to your bust size at the armhole. The optional thin shoulder pads also help if your shoulders slope.
Bust. You choose your size by bust, as explained in how to choose your sewing pattern size. If the fronts gape between buttons or pull across the bust while the shoulders fit, a full bust adjustment is the cleaner fix, since the bust dart is already there to absorb the extra width. Making a quick muslin of the body is worth it here.
Waist. This is the easiest fix on Elodie. The pattern asks you to try the jacket on after the side seams, so you can take in or let out a little there, or adjust the waist darts if you need more shaping at the front or back only. Measure carefully first with how to take your body measurements.
Sewing notes
Fit & style
Pick your size by bust. To lengthen or shorten, change Front, Back and Front Neck Facing equally between the waist notch and the hem. Try the jacket on after the side seams: you can still adjust the waist there.
Fabrics
Medium-weight wovens with body and a soft drape: wool crepe, gabardine, fine flannel, brushed suiting, or linen for summer. Avoid very stiff, thick or stretchy fabrics, as the jacket is fitted and has many darts.
Cutting & sewing
Fuse the facings and both collar stands before sewing, staystitch the neckline, and press every dart over a tailor’s ham. Read step 7 fully before you start.
Choosing fabric for the Elodie jacket
The jacket needs fabric that holds a shape but still bends around the body. Wool crepe and fine flannel are ideal: they press beautifully, so the darts and collar stand look crisp, and they are forgiving if you need to ease the sleeve cap. Gabardine gives a sharper, more tailored finish. For warmer months, linen or a cotton-linen twill makes a lighter, more relaxed version that softens with every wash.
Skip very stiff or thick cloth such as heavy coating or upholstery fabric. With so many darts and a small stand collar, bulk builds up fast and the points will not press flat. Also avoid stretchy knits and fabrics with a lot of give: the jacket is drafted for wovens, and stretch fabric will make it grow at the button band. Slippery, very fluid fabrics like satin or viscose challis lose the structured look.
Treat your fabric the way you will treat the finished jacket. Machine-wash and dry linen and cotton-linen before cutting, as they can shrink noticeably. For wool you plan to dry-clean, steam it thoroughly with the iron held just above the surface, or ask the shop whether it has been pre-shrunk.
Flannel, brushed suiting and some twills have a nap, and their colour changes depending on which way the light hits. Cut every piece with the top pointing the same direction, and remember the materials list already advises about 0.3 m extra for napped or one-way fabrics.
Use a lightweight fusible interfacing, matched to the weight of your fabric, for the facings and both collar stands. Test a scrap first: if the fused sample feels like cardboard, choose a lighter one. On linen, a woven fusible usually gives a softer result than a non-woven one.
Sewing steps
Seam allowance is 1 cm (3/8″) throughout. Sew with right sides together unless a step says otherwise.
- Prepare the pieces. Fuse interfacing to the facings and collar stands. Finish the side, shoulder and lower edges, and staystitch the Front and Back necklines 8 mm from the edge.
- Front darts. Stitch the bust dart from the side edge to the point and the waist dart point to point; knot the threads. Press the bust dart down and the waist dart toward the centre front.
- Back darts. Stitch the shoulder darts and waist darts, knot the threads and press toward the centre back.
- Shoulder seams. Join the Fronts to the Back at the shoulders and press open.
- Make the collar stand. Stitch the two stands along the top edge and both ends, trim, notch the curves, turn and press. Baste the lower edges together.
- Attach the collar stand. Baste it to the neckline, centre backs and shoulder notches matched, with the ends on the button line marks.
- Sew the facing. Join the facings at the shoulders and finish the outer edge. Lay it over the jacket with the stand sandwiched between, stitch up one front, around the neck and down the other front. Grade and clip.
- Finish the facing. Understitch, turn the facing inside, press, and tack it to the shoulder seams.
- Side seams. Stitch the sides from armhole to hem and press open. Try the jacket on and adjust the waist if needed.
- Set in the sleeves. Ease-stitch the cap, sew the underarm seam and hem the sleeve. Pin into the armhole, ease the cap smoothly and stitch.
- Hem the jacket. Stitch across the facing at the hem line and turn it inside, then turn up the 2 cm hem and stitch by machine or by hand.
- Buttons and buttonholes. Make horizontal buttonholes on the right front, sew the buttons on the left front and give the jacket a final press.
Tips and common mistakes
Mark the dart points precisely. A dart that ends a few millimetres off its mark will show as a bubble on the bust. Transfer the points with a tailor’s tack or a dot of chalk, and sew the last centimetre right along the fold.
Keep the button line marks visible. The collar stand ends must land exactly on the button line, as step 6 says. If they drift, the collar will look lopsided once it is buttoned, so baste first and check both sides before stitching the facing.
Grade and clip generously at the neckline. The neck seam joins four layers (jacket, stand and facing), so trim each layer to a different width and clip the curve. This is the difference between a flat, curved collar and a lumpy one.
Test your buttonholes. With eight or nine small 1 cm buttons, a single bad buttonhole is very visible. Make two or three tests on a scrap with the same interfacing and layers, and space them evenly using a ruler or an expanding gauge.
Ease, don’t pleat, the sleeve cap. Pull the ease stitches gently and spread the fullness over the top of the cap. Steam it over the ham before setting the sleeve in; wool will shrink the ease away almost completely.
Variations to try
Cropped Elodie. Shorten the body at the lengthen/shorten point to just below the waist for a boxy-cropped version that pairs well with high-waisted skirts. Re-space the buttons evenly over the new length.
Three-quarter sleeves. Shorten the sleeve to below the elbow for a lighter summer jacket in linen. Taper the hem very slightly so it stays neat.
Contrast collar and buttons. Cut the collar stand in velvet, a contrast linen or a print from your scraps, and choose buttons in a bold colour or covered in the same fabric.
Add patch pockets. Draft two simple patch pockets and sew them to the fronts below the waist dart before the side seams. Place them by trying the jacket on so they sit where your hands naturally fall.
How to style the Elodie jacket
Office day: wool crepe Elodie buttoned to the top as a top, wide-leg trousers in the same or a toning colour, and loafers. The matching set reads as a suit without being stiff.
Weekend: linen Elodie worn open over a white tee or striped top, straight jeans and sneakers. If you want a matching summer dress to wear underneath, the spaghetti strap dress sewing pattern is a natural pair.
Evening: a dark flannel or velvet-collar version over a slip dress or silky camisole, with heeled boots. For a softer, more romantic jacket instead, try the puff sleeve peplum jacket pattern.
Questions
Is seam allowance included?
Yes: 1 cm (3/8″) on every seam and 2 cm (3/4″) at the jacket and sleeve hems.
Which paper sizes are included?
The free download comes in A4 and US Letter, with one file per size from 00 to 22.
How many buttons do I need?
Eight 1 cm (3/8″) buttons for sizes 00 to 14, and nine for sizes 16 to 22. Buy one spare.
Is the jacket lined?
No. The neckline and front edges are finished with an interfaced facing, and the seams are overlocked or zigzagged.
Can I make it in linen for summer?
Yes. Linen or a cotton-linen twill gives a lighter, more relaxed jacket.
Is the Elodie jacket good for beginners?
It is rated confident beginner. If you have already sewn darts and a set-in sleeve, you can make it. The collar stand and buttonholes are the trickiest parts, so take them slowly and test on scraps first.
What size should I make if I want to wear a jumper underneath?
The jacket has about 5–7 cm of ease at the bust, which is planned for a blouse or thin knit. For thicker layers, try sizing up one size and check the fit at the side seams before finishing.
Can I add a lining to this jacket?
The pattern is drafted unlined with facings. You can add a lining yourself by cutting the front (minus the facing), back and sleeves in lining fabric, but this is a self-drafted change and is not covered in the instructions.
How long does it take to sew a fitted jacket like this?
Allow about 6–8 hours for a confident beginner, not counting printing and cutting. Pressing every dart and the collar well takes time but makes the biggest difference to the finish.
Can I use stretch fabric for the Elodie jacket?
A woven with a little stretch, like brushed stretch suiting, is fine. Avoid knits and very stretchy fabrics: the jacket is fitted and buttoned, so stretch will make the front pull and gape.
Why does my collar stand look uneven?
Usually the ends did not land on the button line marks, or the neckline was not staystitched and stretched. Unpick the facing at the neck, re-baste the stand on the marks, and check both fronts side by side.
Do I need shoulder pads?
No, they are optional. Thin 0.5 cm pads give a slightly sharper shoulder and help if your shoulders slope, but the jacket also looks good softly without them.
Happy sewing!
Love our free patterns? Buy us a coffee to keep them coming, or simply share, pin and comment. Thank you!
 Support me on Ko-fi
Keep sewing