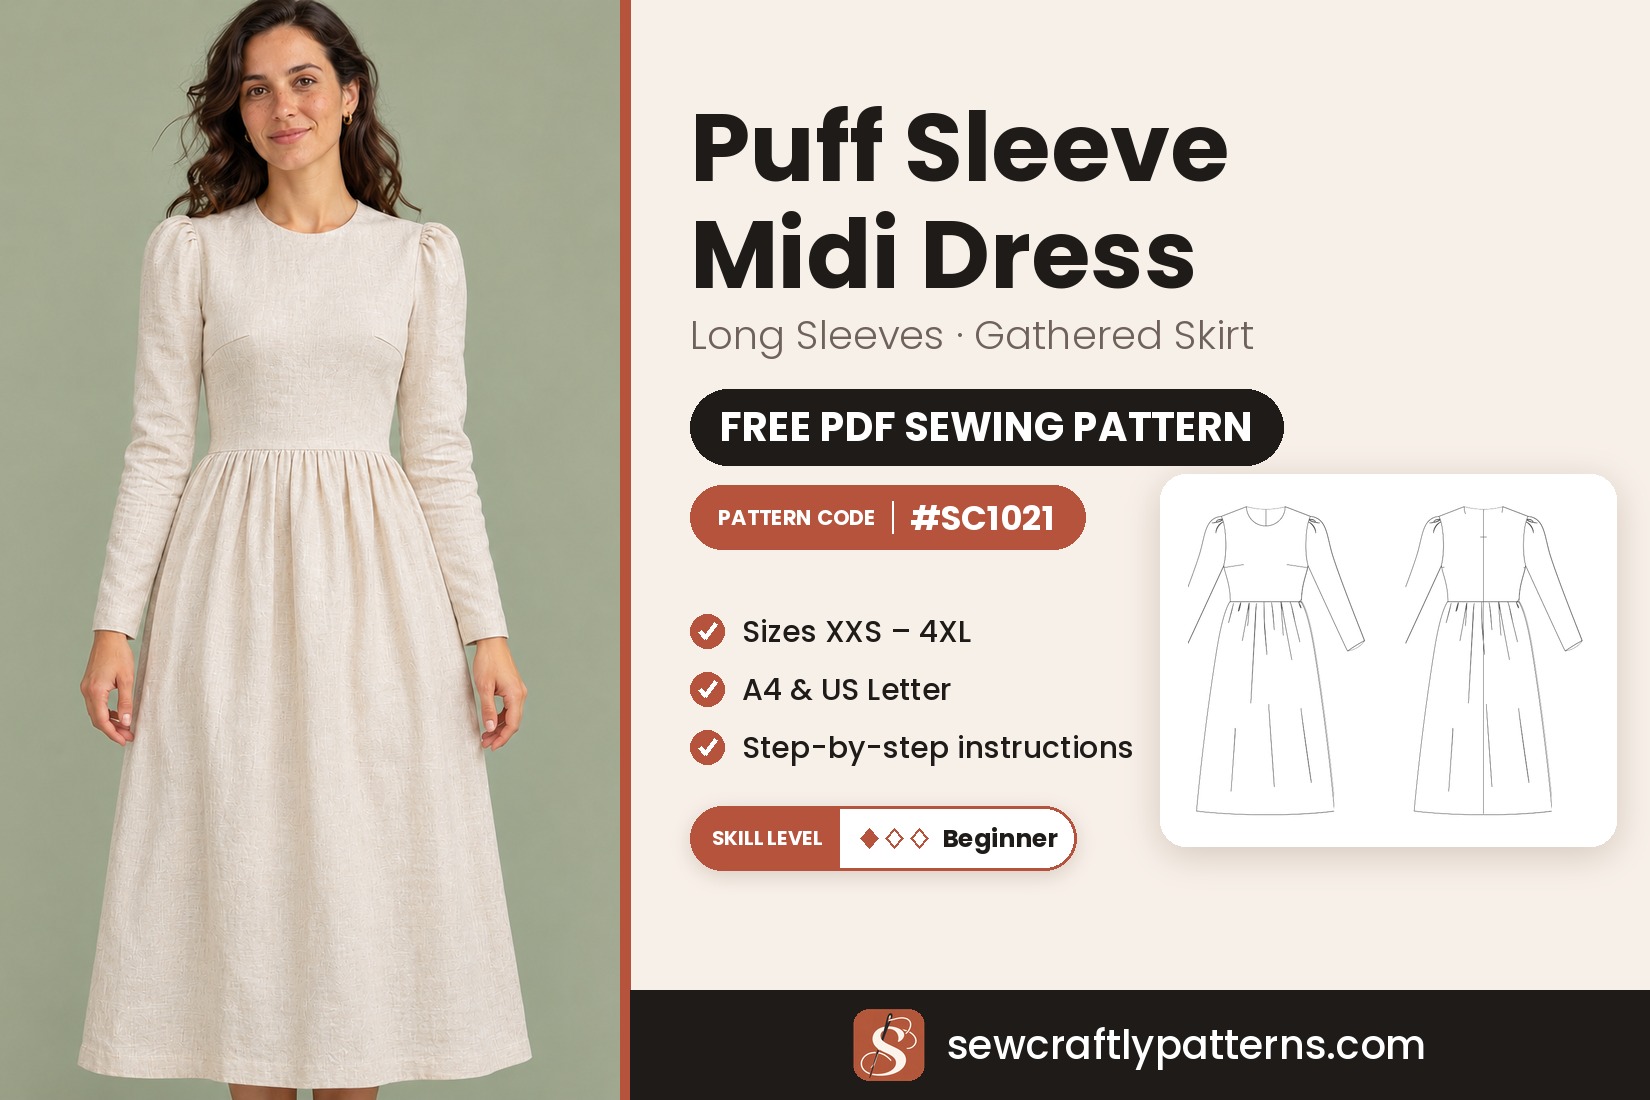
Garment Knit midi dress
Level Easy (confident beginner)
Sizes XXS – 4XL
Fabric Stable knit (ponte, crepe knit)
Pieces 7
The Puff Sleeve Midi Dress has a neat, close-fitting bodice, a softly gathered A-line skirt and long sleeves with a little puff at the shoulder. It is romantic without being fussy, and it works from a day at the office to dinner, with boots in winter or flats in spring.
This free puff sleeve midi dress sewing pattern is made for stable knit fabrics with at least 25 % crosswise stretch, like ponte, scuba crepe or a firm interlock. It has only 7 pattern pieces and one invisible zipper at the center back. You practise bust darts, gathering, an invisible zipper, a neck facing and set-in sleeves, so it is a good step up for a confident beginner. The instructions walk you through every step.
Materials
- Main fabric: 2.1 to 2.9 m (2 3/8 to 3 1/4 yd) of 150 cm wide stable knit, depending on your size: ponte di Roma, double knit, scuba crepe, crepe knit or a firm interlock with elastane (see the fabric table below)
- Lightweight fusible interfacing for knits: 0.3 m (3/8 yd), 90 cm (36″) wide, for the neck facings and two zipper strips
- 1 invisible zipper, 20 cm (8″), plus an invisible zipper foot
- Matching thread and a ballpoint or stretch needle (75/11 to 80/12); optional twin needle for the hems
- Optional: 6 mm (1/4″) clear elastic, about 1.2 m (1 3/8 yd), for the shoulders and the waist seam
Pattern pieces
- 1 Front, main fabric: cut 1, whole piece, single layer
- 2 Skirt front, main fabric: cut 1, whole piece, single layer
- 3 Back, main fabric: cut 2 (a mirrored pair)
- 4 Skirt back, main fabric: cut 2 (a mirrored pair)
- 5 Sleeve, main fabric: cut 2 (a mirrored pair)
- 6 Front neck facing, main fabric + interfacing: cut 1 + 1
- 7 Back neck facing, main fabric + interfacing: cut 2 + 2 (mirrored pairs)
The front and the skirt front are drawn as whole pieces, with the center line marked. Cut them from a single layer, right side up, not on the fold. Also cut two strips of interfacing, 2 × 22 cm (3/4 × 8 5/8″), for the zipper opening.
New to PDF patterns? Start here
Our free step-by-step guides take you from your measurements to a printed pattern:
- How to take your body measurements: what to measure and how, in 10 minutes.
- How to choose your size: which measurement to follow, and what to do between sizes.
- How to print and assemble your pattern: A4 or US Letter, the test box, and taping the pages.
Get the pattern
Free PDF pattern, with one file per size, XXS to 4XL (US 00–22). Share your make with #sewcraftly!
Print page 1 at 100% and check that the test square measures 10 cm (4 in). New to PDF patterns? Read how to print and assemble a PDF pattern.
Printable sewing tutorial
Need help completing the project?
Get the full printable tutorial for the Puff Sleeve Midi Dress: detailed step-by-step sewing instructions with clear illustrations, line sketches, a sizing guide and the list of materials you need.
- Illustrated diagrams for every step, from the invisible zipper to the puff sleeves
- Size charts, finished measurements and fabric amounts per size
- Video guides for the key techniques, with links and QR codes
- Printable PDF, instant download
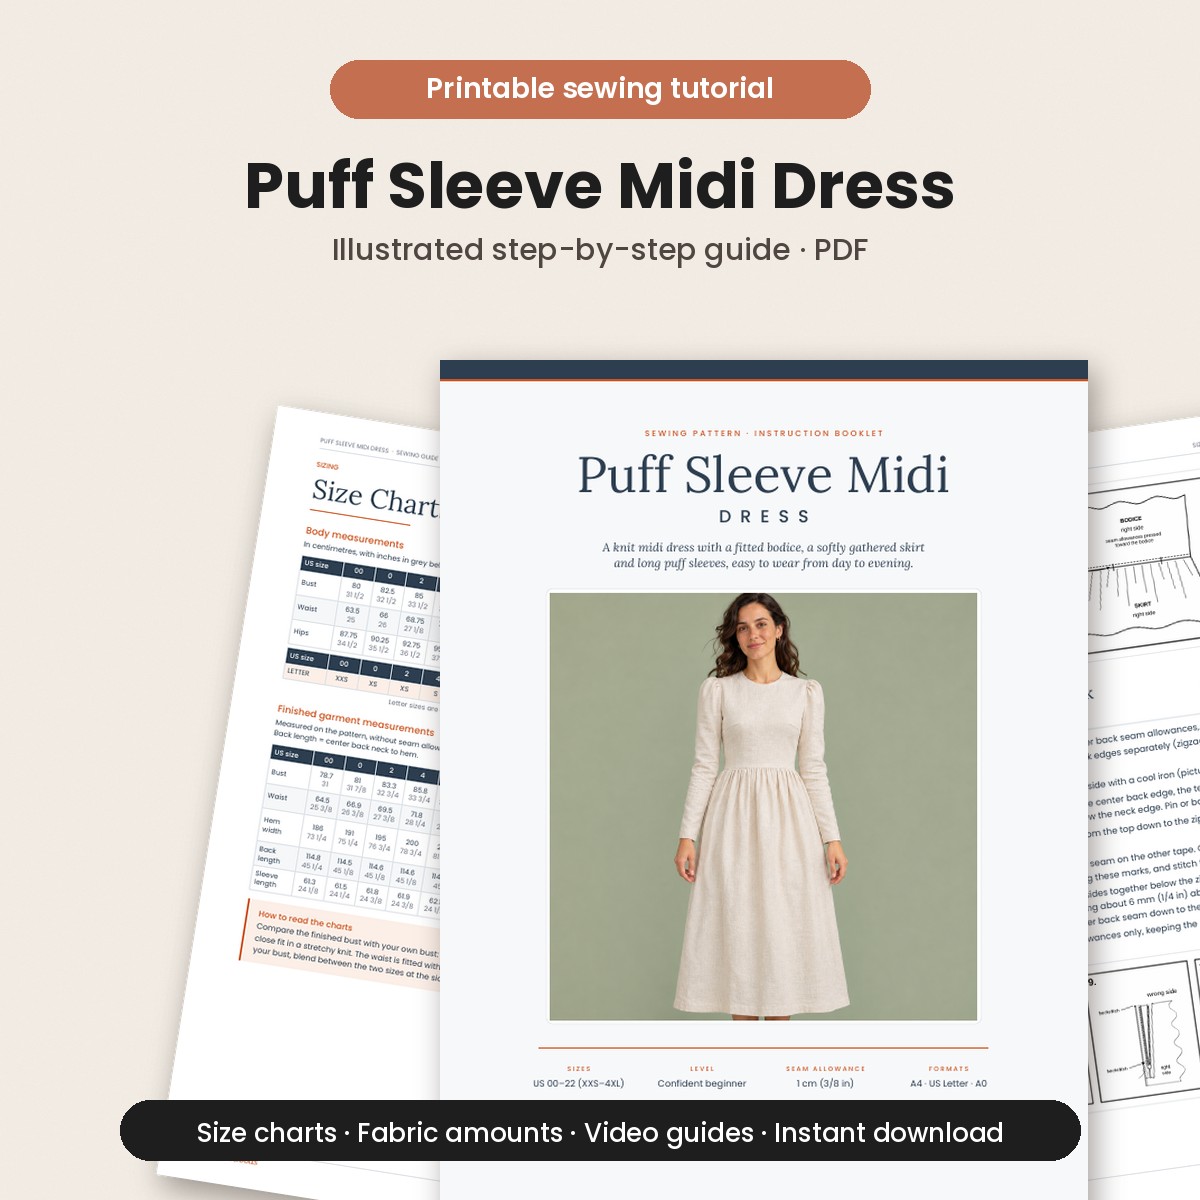
Design details and fit of the Puff Sleeve Midi Dress
- Fitted bodice shaped with two side bust darts and a natural waist seam
- Softly gathered A-line skirt in midi length, gathered at the front and the back
- Long, slim sleeves with a gathered puff at the sleeve head
- Round jewel neckline finished with an interfaced facing
- Invisible zipper at the center back (about 18 cm / 7″ opening) and a center back seam down to the hem
- Close fit at the bust and a fitted waist, drafted for stable knit fabrics
The pattern is drafted for a height of 168 cm (5′6″). The bodice is close-fitting, a little smaller than the body at the bust, so the knit has to stretch to fit. Read all the steps once before you cut: every seam is written in the order it should be sewn, so no seam closes an edge that a later step still needs.
Sizing guide
Drafted for a height of 168 cm (5′6″). Use your body measurements, bust first, then waist and hips, in the table below, then check the finished garment measurements to see the ease. The bodice is close-fitting, so if you are between sizes, choose by your bust. Not sure? Read how to choose your size.
Letter sizes: 00/0 = XXS · 2/4 = XS · 6/8 = S · 10/12 = M · 14 = L · 16 = XL · 18 = XXL · 20 = 3XL · 22 = 4XL
Body measurements
| cm | 00 | 0 | 2 | 4 | 6 | 8 | 10 | 12 | 14 | 16 | 18 | 20 | 22 |
|---|---|---|---|---|---|---|---|---|---|---|---|---|---|
| Bust | 80 | 82.5 | 85 | 87.8 | 90.2 | 92.8 | 95.2 | 99.2 | 104.2 | 109.2 | 114.2 | 119.2 | 124.2 |
| Waist | 63.5 | 66 | 68.8 | 71.2 | 73.8 | 76.2 | 78.8 | 82.8 | 87.5 | 93.2 | 99 | 104.8 | 110.5 |
| Hips | 87.8 | 90.2 | 92.8 | 95.2 | 98 | 100.2 | 102.8 | 106.5 | 111 | 115.5 | 120.8 | 125.8 | 130.8 |
Finished garment measurements
| cm | 00 | 0 | 2 | 4 | 6 | 8 | 10 | 12 | 14 | 16 | 18 | 20 | 22 |
|---|---|---|---|---|---|---|---|---|---|---|---|---|---|
| Bust | 78.7 | 81 | 83.3 | 85.8 | 88.1 | 90.5 | 92.9 | 96.7 | 101.4 | 106.2 | 110.9 | 115.7 | 120.3 |
| Waist | 64.5 | 66.9 | 69.5 | 71.8 | 74.2 | 76.5 | 78.9 | 82.7 | 87.2 | 92.7 | 98.1 | 103.5 | 108.9 |
| Hem width | 186 | 191 | 195 | 200 | 206 | 211 | 216 | 222 | 230 | 239 | 248 | 257 | 265 |
| Back length | 114.8 | 114.5 | 114.6 | 114.6 | 114.4 | 114.2 | 114.1 | 114.6 | 114.4 | 114.3 | 114.3 | 114.3 | 114.5 |
| Sleeve length | 61.3 | 61.5 | 61.8 | 61.9 | 62.1 | 62.3 | 62.5 | 62.6 | 62.8 | 62.8 | 62.9 | 63.1 | 63.1 |
Finished measurements are taken on the pattern, without seam allowances. The bust is a little smaller than the body bust: a difference of 2 to 6 cm (3/4 to 2 3/8″) is the intended close fit in a stretchy knit. Back length is measured from the center back neck to the hem. If your waist is larger than the size you chose for your bust, blend between the two sizes at the side seams of the bodice and the skirt.
Fabric requirements
| cm | US 00–6 | US 8–14 | US 16–22 |
|---|---|---|---|
| Main fabric, 150 cm wide | 210 | 230 | 290 |
| Main fabric, 115 cm wide | 290 | Size 8: 290 · sizes 10–14: use 150 | Use 150 |
| Fusible interfacing, 90 cm wide | 30 | 30 | 30 |
The amounts come from laying out every piece for each size in the group, plus about 8 % for shrinkage and pattern matching. The skirt front is one wide piece: on 115 cm fabric, fold the fabric and cut it on the fold (sizes 00–8 only). Add extra for a one-way print or a fabric with nap. Pre-wash your knit the way you will wash the dress.
Common fit adjustments
Length. Lengthen or shorten the bodice between the bust darts and the waist, the sleeves halfway between the underarm and the hem, and the skirt at the hem. Keep the side seams on the same slant when you change the skirt.
Stretch test. Fold the knit across the grain and mark 10 cm (4″). Stretch it gently crosswise: it should reach at least 12.5 cm (5″) and spring back without rippling. The waist seam has to stretch over your shoulders and bust when you put the dress on, so do not use a fabric with less stretch.
Sewing notes
Fit & style
Choose by bust, because the bodice is close-fitting. Check the length against the finished back length in the table before you cut.
Fabrics
Medium-weight, stable knits with good recovery: ponte, double knit, scuba crepe, crepe knit or a firm interlock. Avoid very thin, slinky jersey and knits without stretch.
Cutting & sewing
Keep the grainline arrows parallel to the selvage so the most stretch goes around the body. Test your stitch and the interfacing on a scrap.
Choosing fabric for a knit midi dress
A fitted bodice and a gathered skirt need a knit that has body. Ponte di Roma or double knit is smooth and holds the gathers and the zipper beautifully. Crepe knit or scuba crepe has a little more drape and looks elegant for the evening. A cotton or viscose interlock with elastane is soft and comfortable for everyday wear. Very thin, slinky jersey is a bad choice, because the zipper and the gathers will pull.
Sew with a ballpoint or stretch needle and a narrow zigzag (width 0.5 to 1, length 2.5) or an overlocker. Let the fabric feed without pulling it, and use a walking foot on slippery knits. Press with medium heat and a press cloth, lifting the iron instead of sliding it.
Sewing steps
Seam allowance 1 cm (3/8″) unless stated otherwise. Sew with a narrow zigzag, a stretch stitch or an overlocker. Right sides together means that the good sides of the fabric face each other.
- Sew the bust darts. Mark the two bust darts on the wrong side of the front (1). Fold each dart right sides together, matching the dart legs. Stitch along the marked line from the side seam toward the dart point, backstitching at the start and leaving a long thread tail at the point. Knot the tails at the dart point and press the darts down. Then staystitch the neckline of the front and of both backs, 6 mm (1/4″) from the edge, so the curve does not stretch.
- Sew the shoulders. With right sides together, pin the front to the two backs (3) at the shoulders and stitch. Optional: catch a length of clear elastic in the seam to keep the shoulders from stretching. Finish the seam allowances (zigzag or overlock) and press them toward the back.
- Sew the bodice side seams. Pin the front to the backs at the side seams, matching the notches, and stitch from the armhole down to the waist. Finish the seam allowances and press them open, or toward the back if you overlock.
- Sew the skirt side seams. Pin the skirt front (2) to each skirt back (4) at the side seams, matching the double notches, and stitch from the waist down to the hem. Finish the seam allowances and press. Leave the center back edges of the skirt open: they are sewn together with the zipper in step 6.
- Gather and join the skirt. Set your machine to the longest straight stitch. Sew two rows of gathering stitches along the skirt waist, 5 mm (1/4″) and 15 mm (5/8″) from the edge, leaving long thread tails. Stop and restart at each side seam, so a thread does not break over the whole length. Turn the bodice right side out and slip it inside the skirt, right sides together, waist edges level. Match the side seams, the waist notches and the center back edges, and pin. Gently pull the bobbin threads until the skirt fits the bodice, spread the gathers evenly and pin every few centimetres. Stitch at 1 cm (3/8″) with the gathered skirt on top, using a narrow zigzag or a stretch stitch so the seam can stretch. Optional: stitch clear elastic, cut to the bodice waist length, into the seam allowance. Remove any gathering stitches that show on the right side, finish the seam allowances together and press them up toward the bodice.
- Sew the invisible zipper and the center back seam. Fuse the interfacing strips to the wrong side of both center back seam allowances, from the neck edge down past the zipper notch. Finish both center back edges separately, from neck to hem. Open the zipper and press the coils flat from the wrong side with a cool iron. Place the open zipper face down on the right side of one center back edge, with the teeth on the 1 cm (3/8″) seam line and the top stop 1.5 cm (5/8″) below the neck edge. Pin or baste, then stitch close to the teeth from the top down to the zipper notch with an invisible zipper foot, backstitching at both ends. Close the zipper and mark the neckline and the waist seam on the other tape. Open it again, pin the second tape to the other center back edge, matching these marks, and stitch the same way. Close the zipper, pin the backs and skirt backs right sides together below it, matching the waist seams and the notch, and stitch the center back seam down to the hem, starting about 6 mm (1/4″) above and slightly to the left of the end of the zipper stitching. Press open. Stitch each end of the zipper tape to the seam allowances only, keeping the dress free.
- Sew the neck facing. Fuse the interfacing to the wrong side of the front neck facing (6) and the two back neck facings (7). Stitch the back facings to the front facing at the shoulders, press the seams open and finish the outer (unnotched) edge with a zigzag or an overlocker. Open the zipper and pin the facing to the neckline, right sides together, matching the shoulder seams and the neckline notches. At the center back, the ends of the facing lie over the zipper tape. Stitch the neckline at 1 cm (3/8″). Trim the facing seam allowance to 3 mm (1/8″) and the dress seam allowance to 5 mm (1/4″), and clip into the curve. Press the seam allowances toward the facing and understitch it close to the seam, as far as you can toward the zipper. Turn the facing to the inside and press. Fold the facing ends in to clear the zipper teeth and slipstitch them to the zipper tape, then tack the facing to the shoulder seam allowances by hand.
- Sew the puff sleeves. On the sleeve head, sew two rows of gathering stitches between the two dots, 5 mm (1/4″) and 15 mm (5/8″) from the edge, backstitching one end of each row and leaving long thread tails at the other. With right sides together, stitch the underarm seam of each sleeve (5), finish the seam allowances and press. Turn the dress inside out and the sleeve right side out, and slip the sleeve into the armhole, right sides together. Match the underarm seam to the side seam, the top notch to the shoulder seam, the single notch to the front and the double notches to the back. Pull the bobbin threads until the sleeve head fits the armhole, keeping the gathers between the dots, then spread them evenly, pin and baste. Stitch from the underarm all the way around with the sleeve side up. Stitch again 6 mm (1/4″) inside the seam allowance, trim close to this second stitching and finish the edges together. Press the seam allowances toward the bodice and remove any gathering stitches that show. Repeat for the second sleeve.
- Hem the skirt and the sleeves. Try the dress on and check the skirt length. Finish the raw edge of the skirt hem and of the sleeve hems. Turn up 2 cm (3/4″) at the skirt hem and on the sleeve HEM line, press, and hand baste close to the fold if the fabric does not hold the crease well. Stitch the hems with a zigzag from the wrong side, or with a twin needle from the right side, about 1.5 cm (5/8″) from the fold so the stitching catches the hem allowance. At the center back, fold the hem allowance up the same way over the seam. Give the whole dress a final press with a press cloth.
Tips and common mistakes
The invisible zipper is the trickiest part. Stabilise the zipper seam allowances with the interfacing strips and baste before you stitch. A zipper sewn straight into a stretchy knit will ripple.
Never put non-stretch tape in the waist seam. It has to stretch over your shoulders and bust. Clear elastic is fine.
Test on a scrap. Try your stitch on two layers of fabric (narrow zigzag, stretch stitch or overlocker), check the needle and test the fusible interfacing before you start.
Do not stretch the neckline. Staystitch it in step 1 and handle the pieces gently, so the curve keeps its shape.
How to style the Puff Sleeve Midi Dress
Winter: a solid ponte with ankle boots and a long coat.
Spring: a small floral or polka dot crepe knit with ballet flats.
Evening: black or a deep jewel tone with heels and a slim belt at the waist seam.
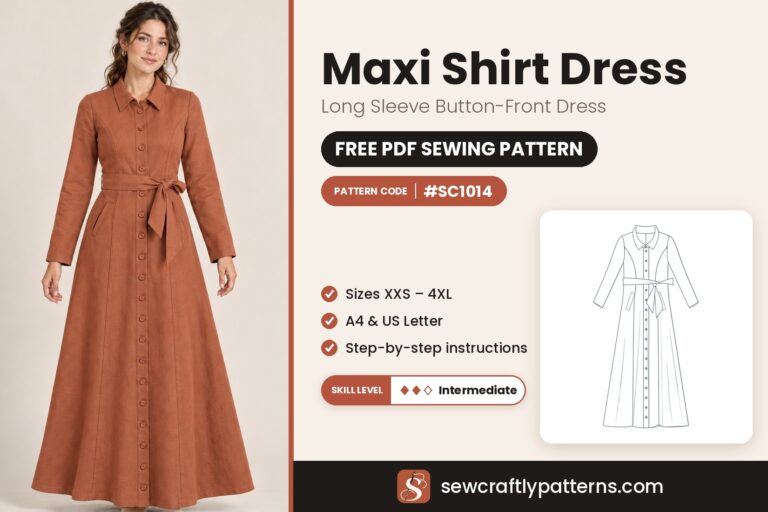
Another long dress to sew: try our maxi shirt dress sewing pattern.
Care
Follow the care label of your fabric. Close the zipper and wash inside out on a gentle, cool cycle. Dry flat or hang over a wide hanger so the skirt does not pull on the waist seam. Press inside out with medium heat and a press cloth.
Questions
Is seam allowance included?
Yes: 1 cm (3/8″) on every piece, and a 2 cm (3/4″) hem allowance on the skirt and the sleeves.
Which paper sizes are included?
The free download comes in A4 and US Letter, as a printable PDF with one file per size, XXS to 4XL (US 00–22).
Which size should I choose?
Choose by your bust, using the body measurement table, because the bodice is close-fitting. Check the finished measurements to see the ease. If your waist is larger than the size chosen for your bust, blend between two sizes at the side seams.
What fabric is best for a puff sleeve midi dress?
A medium-weight, stable knit with at least 25 % crosswise stretch and good recovery: ponte di Roma, double knit, scuba crepe, crepe knit or a firm interlock with elastane. Avoid very thin jersey and knits without stretch.
How much fabric do I need?
About 2.1 to 2.9 m of 150 cm wide knit, depending on your size, plus 0.3 m of fusible interfacing and a 20 cm invisible zipper. See the fabric table above.
Can I make this dress in a woven fabric?
The pattern is drafted for stretch knits and the bodice has very little ease, so a woven fabric will not fit the same way. Use a knit with at least 25 % crosswise stretch.
How do I lengthen or shorten the dress?
The pattern is drafted for 168 cm (5′6″). Change the bodice between the bust darts and the waist, the sleeves halfway between the underarm and the hem, and the skirt at the hem, keeping the side seams on the same slant.
Is this dress good for beginners?
It is rated easy for a confident beginner. The invisible zipper in a knit and the puff sleeves ask for some care, but each step is explained in order. Test your stitch on a scrap first.
Happy sewing!
Love our free patterns? Buy us a coffee to keep them coming, or simply share, pin and comment. Thank you!
 Support me on Ko-fi