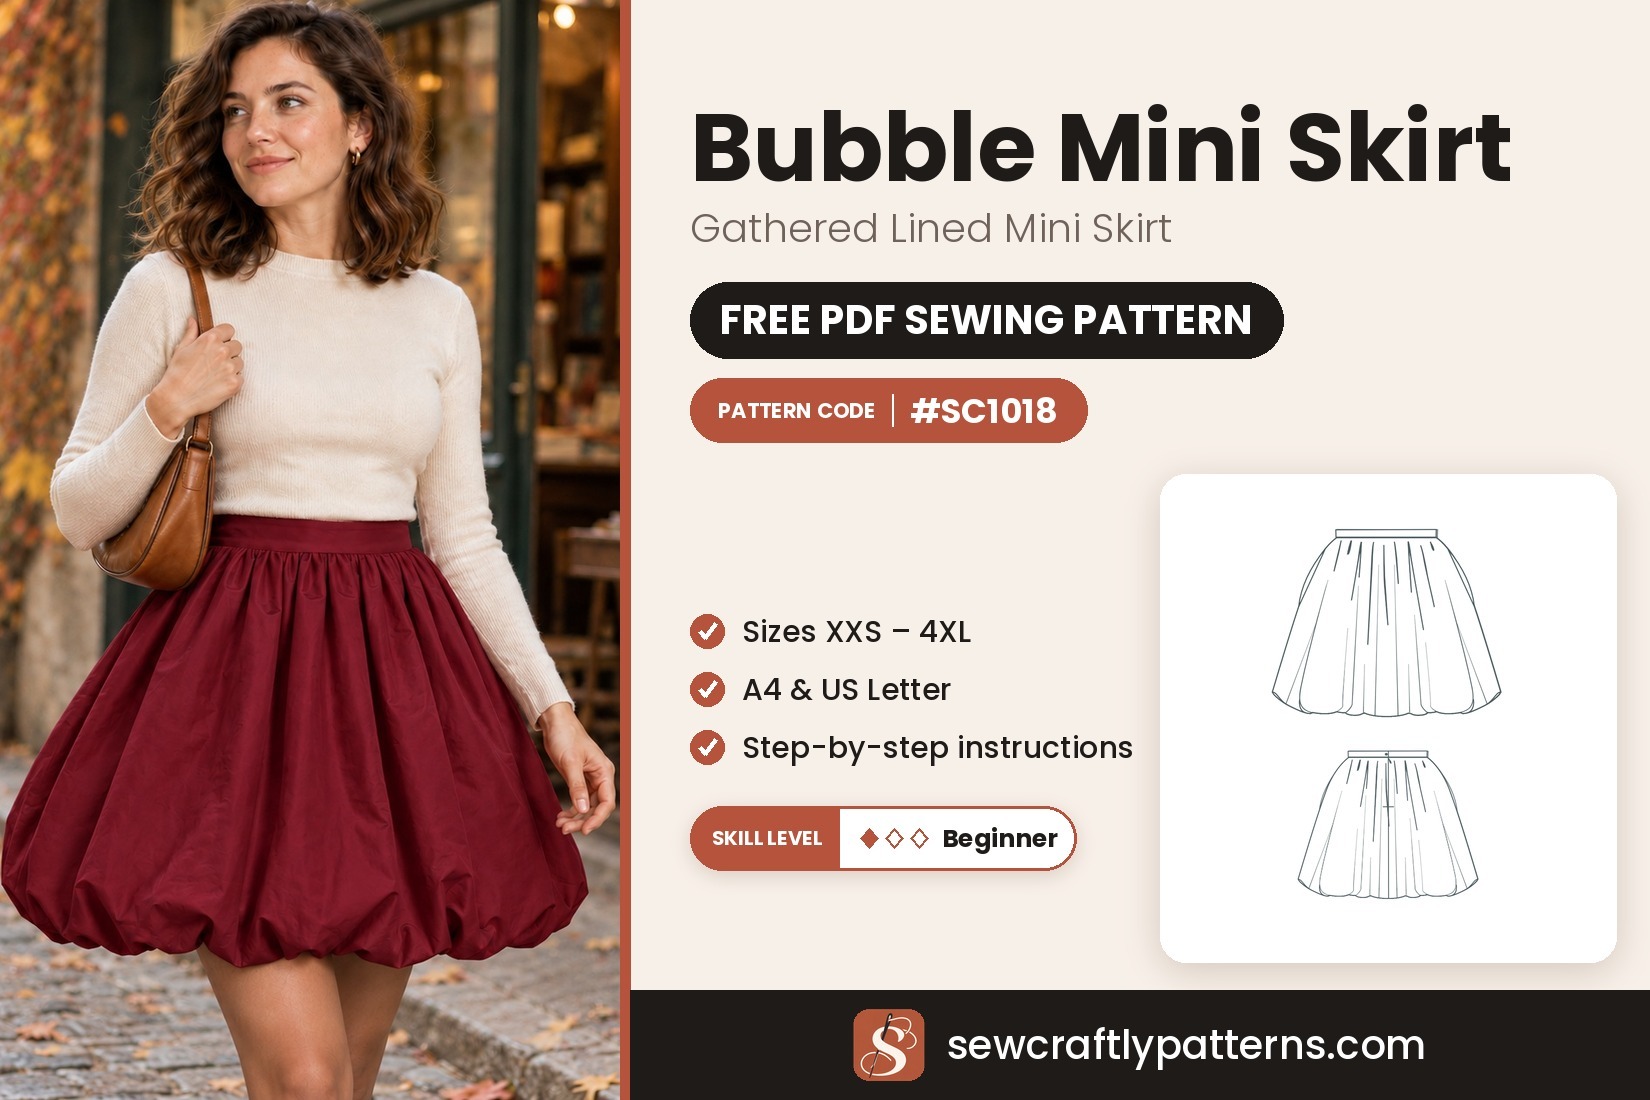
Garment Lined bubble mini skirt
Level Confident beginner
Sizes XXS – 4XL
Fabric Taffeta / sateen / poplin
Pieces 6
This is a short, voluminous bubble (balloon) skirt. The outer skirt is gathered at the waist and at the hem, and it is sewn to a smaller, straight lining, so the hem rolls under into a soft puff. It has a fitted waistband with one button, an invisible zipper at the center back and two hidden inseam pockets.
This free bubble mini skirt sewing pattern is a fun project for anyone who wants to practise gathering, an invisible zipper and a clean lined finish. It is fully lined, so every seam is hidden inside, and the front and the lining front are each cut in one piece, so there is no center front seam. Only six pattern pieces are needed, and the skirt is quick to sew once they are cut. The one part to read twice before you start is the center back (steps 6 and 7), where the zipper and the lining meet.
Materials
- Main fabric: 1.5 to 1.9 m (1 3/4 to 2 1/8 yd) of 150 cm wide light to medium woven with body that holds volume: polyester or silk taffeta, cotton sateen, crisp cotton poplin, faille or dupioni. For winter: brocade, jacquard or a light wool crepe
- Lining: 1.0 to 1.1 m (1 1/8 to 1 1/4 yd) of 150 cm wide cotton batiste or voile, polyester or viscose lining. A slightly crisp lining helps the bubble keep its shape
- Zipper: 1 invisible zipper, 20 cm (8″) or longer (you can shorten it), for all sizes
- Interfacing: 0.2 m (1/4 yd) of light to medium fusible interfacing for the waistband
- 1 button, 1 cm (3/8″) in diameter, and matching thread
Pre-wash the fabric and the lining. Avoid knits and very soft, drapey fabrics such as rayon challis or jersey: the bubble will collapse.
Pattern pieces
- Skirt front: cut 1 from the main fabric, single layer (drawn whole)
- Skirt front lining: cut 1 from the lining, single layer (drawn whole)
- Skirt back: cut 2 from the main fabric (a mirrored pair)
- Skirt back lining: cut 2 from the lining (a mirrored pair)
- Waistband: cut 1 from the main fabric and 1 from fusible interfacing
- Pocket bag: cut 4 from the lining (two mirrored pairs)
The skirt front and its lining are not cut on the fold: cut them from a single layer. For the pairs, fold the fabric right sides together and cut through both layers.
New to PDF patterns? Start here
Our free step-by-step guides take you from your measurements to a printed pattern:
- How to take your body measurements: what to measure and how, in 10 minutes.
- How to choose your size: which measurement to follow, and what to do between sizes.
- How to print and assemble your pattern: A4 or US Letter, the test box, and taping the pages.
Get the pattern
Free PDF pattern in A4 and US Letter, with one file per size, XXS to 4XL (US 00–22). Share your make with #sewcraftly!
Print page 1 at 100% and check that the test square measures 10 cm (4 in). New to PDF patterns? Read how to print and assemble a PDF pattern.
Printable sewing tutorial
Need help completing the project?
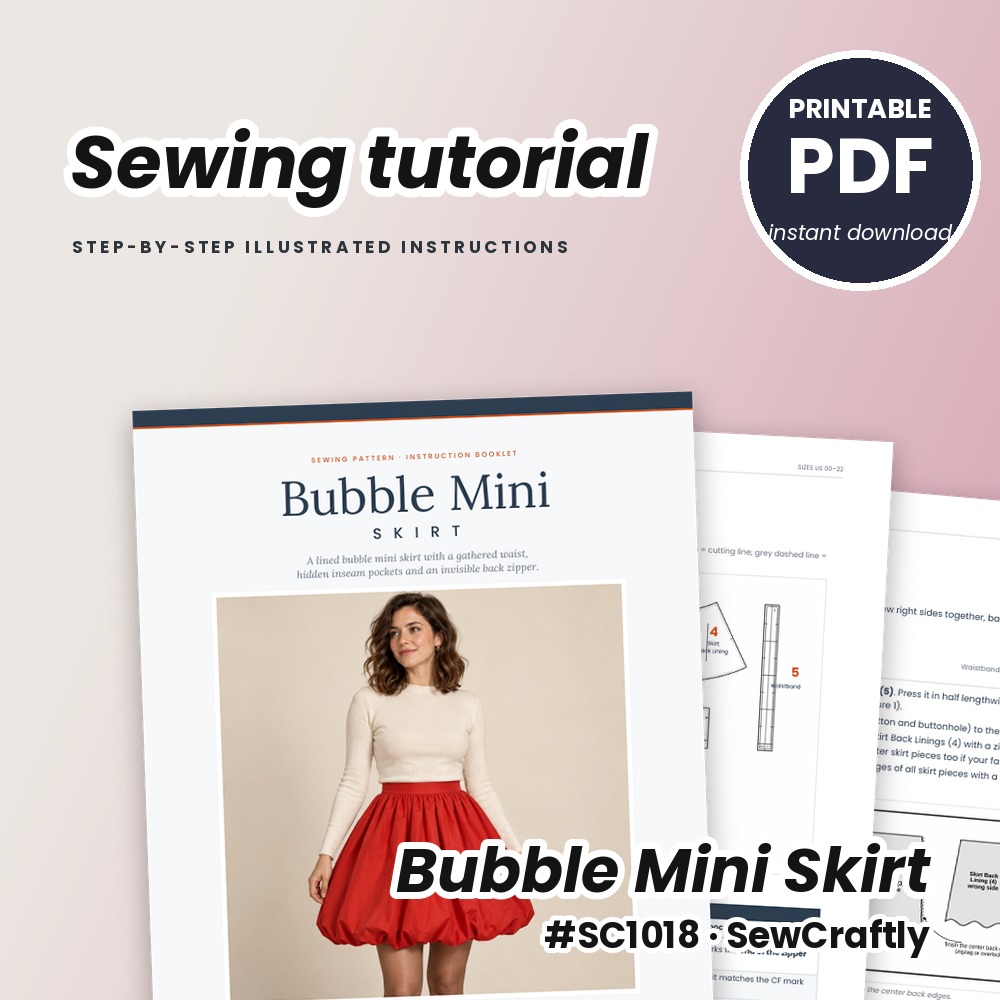
Get the full printable tutorial for the Bubble Mini Skirt: detailed step-by-step sewing instructions with clear illustrations, line sketches, a sizing guide and the list of materials you need.
- Illustrated diagrams for every step, from the inseam pockets to the invisible zipper
- Size charts, finished measurements and fabric amounts per size
- Video guides for the key techniques, with links and QR codes
- Printable PDF, instant download
Design details and fit of the bubble mini skirt
The bubble shape comes from the construction: a gathered outer skirt is joined at the hem to a shorter, straight lining, which pulls the hem under and makes it puff out. The waist is gathered onto a 3 cm (1 1/8″) straight waistband that closes at the center back with an invisible zipper and one button. The waistband is fitted, with about 1–2 cm (1/2–3/4″) of ease at the waist, so the waist measurement matters most when you choose your size. The skirt is very full, so the hips have plenty of ease. If you are between sizes, choose by the waist.
The pattern is drafted for a height of 168 cm (5′6″), and the finished skirt is about 42 cm (16 1/2″) long from the top of the waistband. To change the length, lengthen or shorten the lining by the amount you want and the outer skirt by about 1.5 times that amount, halfway down each piece, keeping the waist and hem edges the same length.
Difficulty and sewing time
The skirt is a good step up for a confident beginner. It has no center front seam and no buttonholes beyond one small one, but you will gather three edges, set an invisible zipper and close a lining by hand. Allow an afternoon for sewing, plus an evening for printing, taping and cutting. Before you start, test a long gathering stitch (4–5 mm) and your interfacing on a scrap of your fabric.
Sizing guide
Drafted for a height of 168 cm (5′6″). Choose your size by waist. Not sure? Read how to choose your size.
Letter sizes: 00/0 = XXS · 2/4 = XS · 6/8 = S · 10/12 = M · 14 = L · 16 = XL · 18 = XXL · 20 = 3XL · 22 = 4XL
Body measurements
| cm | 00 | 0 | 2 | 4 | 6 | 8 | 10 | 12 | 14 | 16 | 18 | 20 | 22 |
|---|---|---|---|---|---|---|---|---|---|---|---|---|---|
| Bust | 80 | 82.5 | 85 | 87.8 | 90.2 | 92.8 | 95.2 | 99.2 | 104.2 | 109.2 | 114.2 | 119.2 | 124.2 |
| Waist | 63.5 | 66 | 68.8 | 71.2 | 73.8 | 76.2 | 78.8 | 82.8 | 87.5 | 93.2 | 99 | 104.8 | 110.5 |
| Hips | 87.8 | 90.2 | 92.8 | 95.2 | 98 | 100.2 | 102.8 | 106.5 | 111 | 115.5 | 120.8 | 125.8 | 130.8 |
Finished garment measurements
| cm | 00 | 0 | 2 | 4 | 6 | 8 | 10 | 12 | 14 | 16 | 18 | 20 | 22 |
|---|---|---|---|---|---|---|---|---|---|---|---|---|---|
| Waist | 65.3 | 68 | 70.6 | 73.2 | 75.7 | 78.1 | 80.6 | 84.6 | 89.4 | 95.2 | 100.9 | 106.6 | 112.5 |
| Bubble hem | 135 | 137 | 140 | 144 | 148 | 153 | 156 | 161 | 165 | 171 | 176 | 182 | 188 |
| Length | 42 | 42 | 42 | 42 | 42 | 42 | 42 | 42 | 42 | 42 | 42 | 42 | 42 |
Waist is the finished waist at the waist seam, measured on the lining. Bubble hem is the circumference of the folded hem edge. Length is measured from the top of the waistband to the hem fold at the side seam; the puff makes the skirt look a little shorter.
Fabric requirements
| cm | 00–6 | 8–14 | 16–22 |
|---|---|---|---|
| Main, 150 cm wide | 150 | 170 | 190 |
| Main, 115 cm wide | 290 | 320 | 360 |
| Lining, 150 cm wide | 100 | 110 | 110 |
| Lining, 115 cm wide | 110 | 120 | 140 |
| Interfacing, 90 cm wide | 20 | 20 | 20 |
All pieces laid out single layer on the grain, plus about 8 % for shrinkage and straightening. For a large print that needs matching, allow extra.
Sewing notes
Fit & style
Choose your size by the waist. The skirt is very full, so the hips never need adjusting.
Fabrics
Light to medium wovens with body: taffeta, sateen, poplin or faille. Avoid knits and soft, drapey fabrics.
Cutting & sewing
Transfer every notch and the center front line. Never press the bubble flat: steam it from the inside and shape it by hand.
Choosing fabric for the bubble mini skirt
The fabric decides how well the bubble holds. Taffeta is the classic choice, because it is crisp and keeps the volume, and cotton sateen or crisp poplin give a softer, more everyday version. Faille and dupioni work well for parties, and a brocade or jacquard makes a rich winter skirt. Choose a lining that is a little crisp too, such as cotton batiste or voile: it supports the puff at the hem.
Press every seam as you go, but never press the bubble flat. Once the hem is joined, hold the iron above the skirt, steam the puff from the inside and shape it with your hands while it cools.
Sewing steps
Seam allowance is 1 cm (3/8″) unless stated otherwise. Sew right sides together, backstitch at the start and end of every seam, and press as you go.
- Prepare the pieces. Fuse the interfacing to the wrong side of the waistband, press it in half lengthwise along the fold line and open it out again. Transfer the waistband marks (center back, side seams, center front, button and buttonhole). Finish the center back edges of the skirt backs and the back linings with a zigzag or overlock stitch, and finish the side edges of the outer skirt if your fabric frays. Mark the center back, side and center front points on the waist and hem edges of all skirt pieces.
- Pockets and outer side seams. Pin one pocket bag to each side edge of the skirt front and of each skirt back, right sides together, matching the pocket notches, and stitch at 1 cm. Press the bags outwards, away from the skirt, and understitch or topstitch them close to the seam. Pin the front to the backs at the side seams and stitch from the waist to the upper pocket notch, pivot, stitch around the pocket bag, pivot at the lower notch and continue to the hem. Clip the back seam allowance above and below the pocket, press the side seams open and the pockets toward the front, and baste the top of each pocket bag to the front waist edge.
- Lining side seams. Pin the back linings to the front lining at the side seams, right sides together, and stitch at 1 cm. Finish the seam allowances and press them open. Leave the center back of the lining open for now. The lining is not gathered.
- Gather the outer hem. With the center back still open, sew two rows of long stitches (4–5 mm) along the hem edge, at 5 mm and 8 mm from the edge, leaving long thread tails. Start and stop the rows at each side seam so you gather the front and the two backs separately, and do not backstitch. Pull the two bobbin threads until the outer hem matches the lining hem between the same marks (center back, side seam, center front).
- Join the outer skirt and the lining at the hem. Place the gathered outer hem on the lining hem, right sides together, matching the center back edges, the side seams and the center front. Spread the gathers evenly, pin closely and stitch at 1 cm with the gathered layer on top. Finish both seam allowances together and press them toward the lining. Fold the lining up inside the outer skirt, wrong sides together: the hem seam now sits inside the hem fold and the outer skirt puffs out into the bubble. Keep the center back open.
- Invisible zipper. Unfold the lining down again, so the skirt lies flat, and sew the zipper to the outer skirt only. Open the zipper and press the coils flat from the wrong side with a cool iron. On the right side of one skirt back, place the open zipper face down with the top stop at the waist seam line (1 cm below the raw edge), coil on the 1 cm seam line, and stitch with an invisible zipper foot from the top down to the zipper notch. Close the zipper, mark the waist seam on the second tape, open it again and stitch the second side the same way.
- Center back seam. Fold the whole skirt right sides together at the center back, so the outer edges meet and the lining edges meet below them, and match the hem seam exactly. With a regular zipper foot, start slightly above and to the left of the end of the zipper stitching and sew one continuous seam: down the outer center back, across the hem seam and up the lining center back, stopping at the lining notch 20 cm (8″) below the waist edge. Press the seam open and stitch the lower ends of the zipper tape to the seam allowances only.
- Join the waist. Turn the lining up inside the skirt again, wrong sides together, and fold the lining seam allowance back clear of the zipper teeth. Sew two gathering rows along the outer waist edge (5 mm and 8 mm from the edge), section by section, and pull up the gathers until the outer waist matches the lining waist at the center back, side seams and center front. Pin the layers together, spread the gathers evenly and baste at 7 mm. Check that the skirt waist matches the waistband from center back mark to center back mark.
- Waistband. Pin one long edge of the waistband to the skirt waist, right sides together, matching the center back, side and center front marks. The plain end lines up with one zipper edge, and the end with the extension (button mark) reaches 3 cm (1 1/8″) beyond the other zipper edge. Stitch at 1 cm and press the seam allowances into the waistband. Fold the waistband along the fold line, right sides together, stitch across the plain end at 1 cm, and at the extension end stitch across the end and along the lower edge up to the seam. Trim the corners, turn the waistband right side out, fold the inner seam allowance under so it just covers the seam line, and stitch in the ditch from the right side or slipstitch by hand.
- Lining at the zipper and button. On the inside, fold the lining seam allowance under along the zipper and slipstitch it to the zipper tape, keeping the stitches well away from the teeth. Make a 1 cm (3/8″) horizontal buttonhole on the overlapping end of the waistband at the buttonhole mark, and sew the button on the extension at the button mark.
- Final press. Remove any visible basting and press the waistband and the side seams with a pressing cloth. Do not flatten the hem fold: hold the iron above the skirt, steam the bubble from the inside, then shape the puff with your hands and let it cool.
Tips and common mistakes
Read the center back steps twice. The zipper (step 6) and the continuous seam that crosses the hem seam and goes up the lining (step 7) are the trickiest part. Match the hem seam exactly before you stitch.
Gather in sections. Stop the gathering rows at each side seam and gather the front and the two backs separately, so the fullness stays even all around the skirt.
Test on a scrap first. Check that the gathering stitch pulls up easily and that the interfacing does not bubble or show through the fabric.
How to style the bubble mini skirt
Winter: with a fine knit sweater, tights and ankle boots.
Summer: with a tucked-in shirt or a fitted tee and ballet flats. The princess seam shirt sewing pattern is a good match.
Parties and holidays: in taffeta or brocade.
Questions
Is seam allowance included?
Yes: 1 cm (3/8″) on every edge. There is no separate hem allowance, because the outer skirt and the lining are joined at the hem with a 1 cm seam.
Which paper sizes are included?
The free download comes in A4 and US Letter, with one file per size, XXS to 4XL (US 00–22).
Why is the skirt lined?
The lining is what makes the bubble. The gathered outer skirt is sewn to a shorter, straight lining at the hem, and that pulls the hem under into a soft puff. It also hides every seam inside.
What fabric is best for a bubble skirt?
Light to medium wovens with body that hold volume: taffeta, cotton sateen, crisp poplin, faille or dupioni. Avoid knits and very soft, drapey fabrics such as rayon challis or jersey, because the bubble will collapse.
Which size should I choose?
Choose by your waist, because the waistband is fitted with about 1–2 cm (1/2–3/4″) of ease. The skirt is very full, so the hips have plenty of ease. If you are between sizes, choose by the waist.
How do I make the skirt longer or shorter?
Lengthen or shorten the lining by the amount you want, and the outer skirt by about 1.5 times that amount, halfway down each piece. Keep the waist and hem edges the same length. The finished skirt is about 42 cm (16 1/2″) long.
Is this pattern good for beginners?
It suits a confident beginner. You will gather, sew an invisible zipper and close a lining, so it helps to have made a simple skirt before. The center back steps are the trickiest, so read them first.
Happy sewing!
Love our free patterns? Buy us a coffee to keep them coming, or simply share, pin and comment. Thank you!
 Support me on Ko-fi