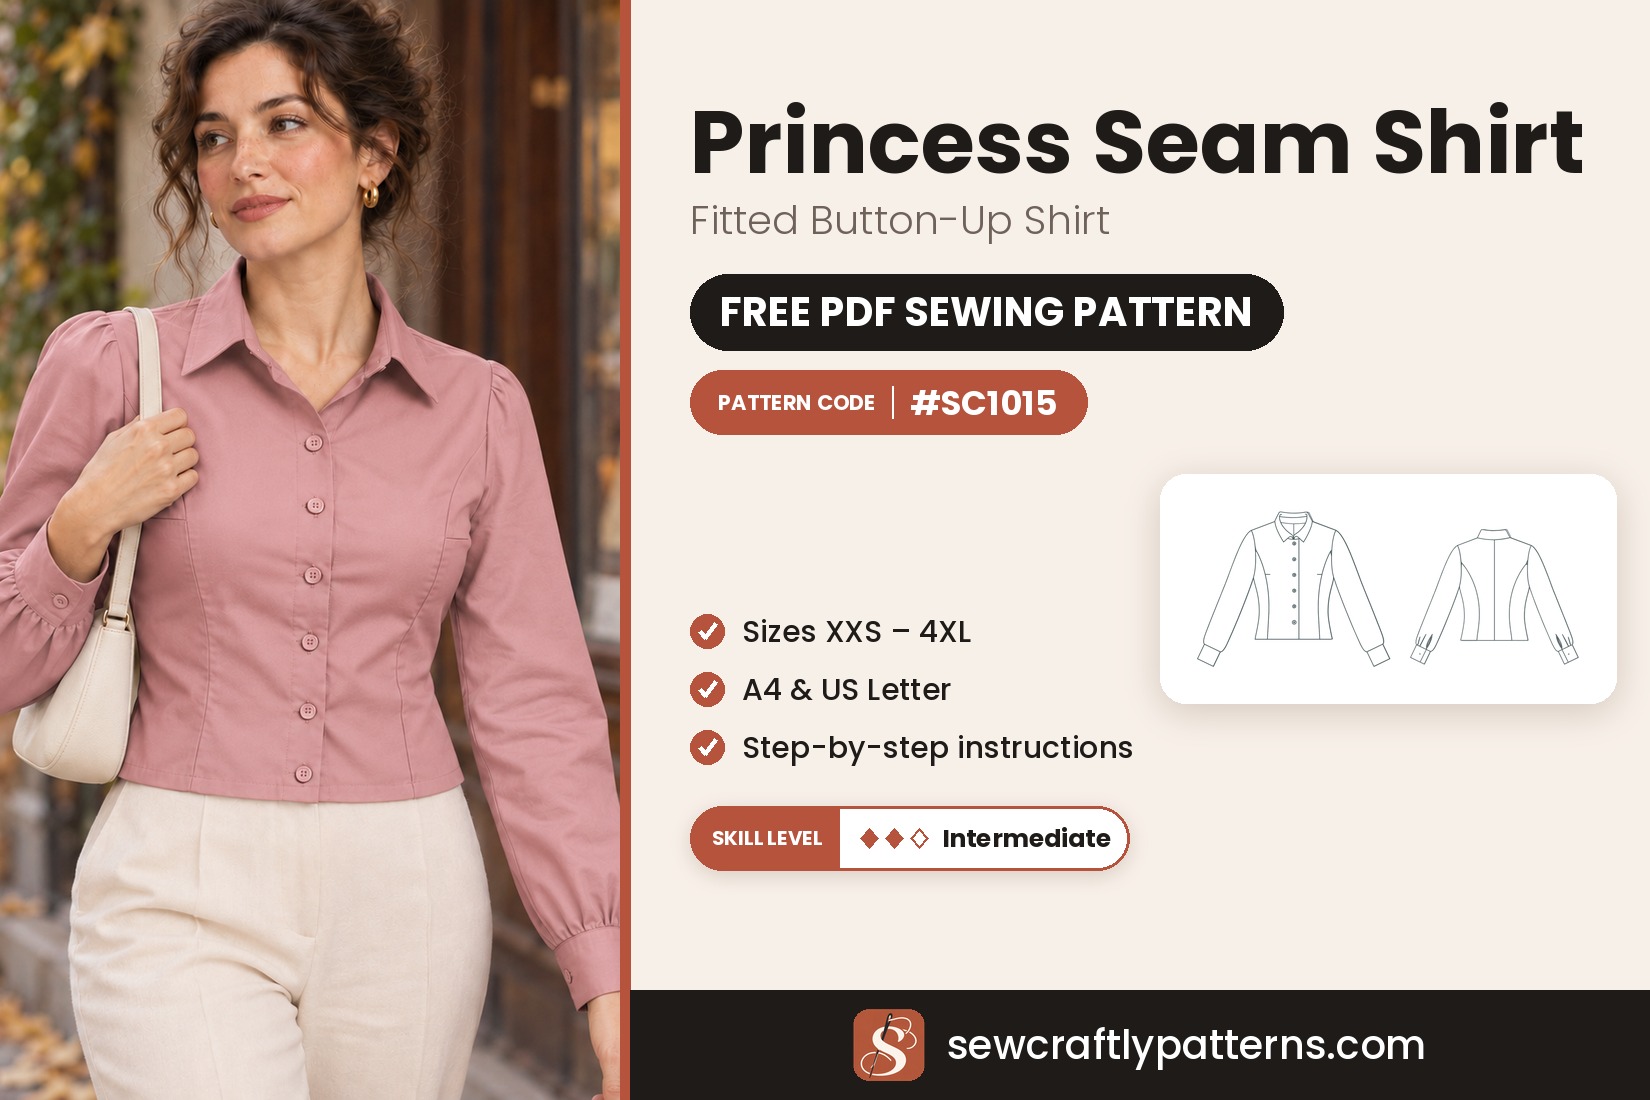
Garment Fitted button-up shirt
Level Intermediate
Sizes XXS – 4XL
Fabric Medium-weight woven
Pieces 14
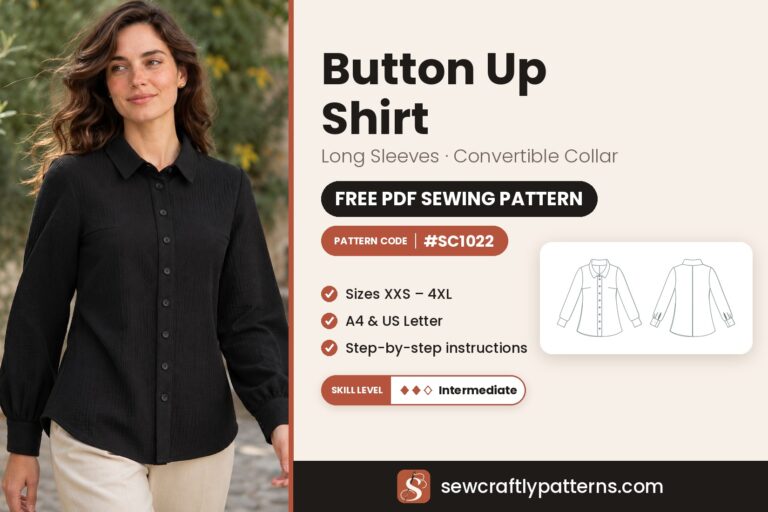
The Princess Seam Shirt is a fitted, fully lined button-up shirt with a classic shirt collar, soft pleated sleeves and buttoned cuffs. Front and back princess seams and two small front darts shape it to the body without feeling tight, and it sits just below the waist, so it looks great with high-waisted trousers and skirts.
This free princess seam shirt sewing pattern is made for medium-weight woven fabrics with some body, like cotton twill, cotton sateen, firm poplin, a linen blend or light wool suiting. It has 14 pattern pieces: 10 in main fabric and 4 in lining, with a six-button front. The lining makes the inside clean and lets the shirt slide on easily over other layers. The collar and the lining finish ask for some care, so we rate it intermediate, and the instructions walk you through every step.
Materials
- Main fabric: 1.5 to 1.9 m (1 3/4 to 2 1/8 yd) of 150 cm wide medium-weight woven, depending on your size: cotton twill, cotton sateen, firm poplin, linen blend or light wool suiting (see the fabric table below)
- Lining: 1.2 m (1 3/8 yd) of 150 cm wide smooth, light lining: cupro, viscose lining, cotton voile or polyester habotai
- Light fusible interfacing: 1.9 to 2.1 m (2 1/8 to 2 3/8 yd), 90 cm (36″) wide
- Buttons: 6 buttons, 1.5 cm (5/8″), for the front, and 2 small buttons, 0.5 cm (1/4″), for the cuffs
- Matching all-purpose thread
- Optional: a pair of thin shoulder pads, 1 cm (3/8″), a pressing ham, a point turner and a buttonhole foot
Pattern pieces
- 1 Front lining, lining: cut 2
- 2 Center front, main fabric + interfacing: cut 2
- 3 Side front, main fabric + interfacing: cut 2
- 4 Center back, main fabric + interfacing: cut 2
- 5 Center back lining, lining: cut 1, single layer
- 6 Side back, main fabric + interfacing: cut 2
- 7 Side back lining, lining: cut 2
- 8 Sleeve, main fabric: cut 2
- 9 Sleeve lining, lining: cut 2
- 10 Cuff, main fabric + interfacing: cut 2
- 11 Front neck facing, main fabric + interfacing: cut 2
- 12 Back neck facing, main fabric + interfacing: cut 1, single layer
- 13 Collar, main fabric + interfacing: cut 2, single layer, as drawn
- 14 Edging, main fabric + interfacing: cut 2
Cut the pieces marked “cut 2” from a double layer of fabric, folded right sides together, to get a mirrored pair. The center back lining (5), back neck facing (12) and collar (13) are drawn whole: the FOLD label marks the center back only, so cut them from a single layer, not on the fold.
New to PDF patterns? Start here
Our free step-by-step guides take you from your measurements to a printed pattern:
- How to take your body measurements: what to measure and how, in 10 minutes.
- How to choose your size: which measurement to follow, and what to do between sizes.
- How to print and assemble your pattern: A4 or US Letter, the test box, and taping the pages.
Get the pattern
Free PDF pattern, with one file per size, XXS to 4XL (US 00–22). Share your make with #sewcraftly!
Print page 1 at 100% and check that the test square measures 10 cm (4 in). New to PDF patterns? Read how to print and assemble a PDF pattern.
Printable sewing tutorial
Need help completing the project?
Get the full printable tutorial for the Princess Seam Shirt: detailed step-by-step sewing instructions with clear illustrations, line sketches, a sizing guide and the list of materials you need.
- Illustrated diagrams for every step, from the princess seams to the shirt collar
- Size charts, finished measurements and fabric amounts per size
- Video guides for the key techniques, with links and QR codes
- Printable PDF, instant download
Design details and fit of the Princess Seam Shirt
- Fitted shape with front and back princess seams, and a center back seam
- Small shaping dart on each center front
- Classic shirt collar, cut double and interfaced
- Six-button front closure with front facings
- Full sleeves with eased caps, two soft pleats at the hem and a bound slit
- Buttoned cuffs
- Fully lined body and sleeves, with a soft pleat at the back lining for movement
The shirt has about 9 cm (3 1/2″) of ease at the bust, so it is fitted but comfortable. It is drafted for a height of 168 cm (5′6″). The center back length from the neck seam to the hem is about 52 cm (20 5/8″) in a middle size, just below the waist.
Difficulty and what to know before you start
The pattern is rated intermediate. The trickiest part is attaching the collar between the shell and the facing and lining unit (step 9), then closing the lining at the hem (steps 10 and 11). Read those steps once before you start. Then you set in two sleeves, sew a bound slit on each and make eight buttonholes.
Sizing guide
Drafted for a height of 168 cm (5′6″). Choose by your bust measurement in the table below, then check the finished garment measurements to see the ease. If your waist or hips fall in a different size, blend between sizes along the princess and side seams. Not sure? Read how to choose your size.
Letter sizes: 00/0 = XXS · 2/4 = XS · 6/8 = S · 10/12 = M · 14 = L · 16 = XL · 18 = XXL · 20 = 3XL · 22 = 4XL
Body measurements
| cm | 00 | 0 | 2 | 4 | 6 | 8 | 10 | 12 | 14 | 16 | 18 | 20 | 22 |
|---|---|---|---|---|---|---|---|---|---|---|---|---|---|
| Bust | 80 | 82.5 | 85 | 87.8 | 90.2 | 92.8 | 95.2 | 99.2 | 104.2 | 109.2 | 114.2 | 119.2 | 124.2 |
| Waist | 63.5 | 66 | 68.8 | 71.2 | 73.8 | 76.2 | 78.8 | 82.8 | 87.5 | 93.2 | 99 | 104.8 | 110.5 |
| Hips | 87.8 | 90.2 | 92.8 | 95.2 | 98 | 100.2 | 102.8 | 106.5 | 111 | 115.5 | 120.8 | 125.8 | 130.8 |
Finished garment measurements
| cm | 00 | 0 | 2 | 4 | 6 | 8 | 10 | 12 | 14 | 16 | 18 | 20 | 22 |
|---|---|---|---|---|---|---|---|---|---|---|---|---|---|
| Bust | 88 | 90.5 | 93.4 | 96 | 98.8 | 101.5 | 104.1 | 108.4 | 113.4 | 119.5 | 125.5 | 131.6 | 137.6 |
| Waist | 77.5 | 80 | 82.8 | 85.2 | 87.9 | 90.5 | 93.1 | 97.3 | 102.2 | 108.2 | 114.2 | 120.2 | 126.1 |
| Hem | 92.9 | 95.4 | 98.3 | 101.3 | 104.5 | 107.7 | 110.6 | 114.7 | 119.5 | 125.2 | 130.8 | 136.7 | 142.3 |
| Back length | 52.1 | 52.1 | 52.3 | 52.4 | 52.5 | 52.5 | 52.6 | 52.7 | 52.7 | 52.8 | 53.1 | 53.2 | 53.5 |
| Across shoulders | 38.2 | 38.4 | 38.9 | 39.2 | 39.6 | 39.8 | 39.9 | 40.9 | 41.5 | 41.9 | 42.5 | 43.2 | 44 |
| Sleeve length | 55.2 | 55.2 | 55.3 | 55.3 | 55.4 | 55.4 | 55.4 | 55.5 | 55.6 | 55.6 | 55.7 | 55.8 | 55.9 |
Finished measurements are taken on the pattern, without seam allowances. Bust, waist and hem are full circumferences. Back length is measured at center back from the neck seam to the hem, and sleeve length from the shoulder point to the wrist.
Fabric requirements
| cm | US 00–6 | US 8–14 | US 16–22 |
|---|---|---|---|
| Main fabric, 150 cm wide | 150 | 160 | 190 |
| Main fabric, 115 cm wide | 190 | 220 | 220 |
| Lining, 150 cm wide | 120 | 120 | 120 |
| Lining, 115 cm wide | 130 | 140 | 170 |
| Fusible interfacing, 90 cm wide | 190 | 200 | 210 |
Amounts come from laying out the real pattern pieces of every size on each fabric width, without nap, plus about 8 % for straightening and shrinkage. Allow extra for one-way prints, nap or pattern matching. Pre-wash your fabric before cutting.
Common fit adjustments
Length. The shirt sits just below the waist. To change the body length, lengthen or shorten every body piece, lining and front facing by the same amount at waist level. Change the sleeve and sleeve lining halfway between the underarm and the slit.
Between two sizes. Choose by your bust and blend to the next size at the waist and hip along the princess and side seams. See how to take your body measurements if you want to double-check.
Sewing notes
Fit & style
Choose by bust and blend sizes at the waist and hip. Check the length against the finished back length before you cut.
Fabrics
Medium-weight wovens with some body: cotton twill, cotton sateen, firm poplin, linen blend or light wool suiting. A little stretch (2–4 % elastane) is the most comfortable.
Cutting & sewing
Keep the grainline arrows parallel to the selvage, transfer every marking, and test the stitch length, the interfacing and one buttonhole on a scrap.
Choosing fabric for a princess seam shirt
A fitted shirt needs a fabric with a little body, so the collar stands neatly and the princess seams keep their shape. Cotton twill and cotton sateen are easy to sew and press well, a firm poplin gives a crisp, classic look, and a linen blend or a light wool suiting is lovely for autumn. A woven with 2 to 4 % elastane is the most comfortable to wear. For the lining, choose something smooth and light, like cupro, viscose lining, cotton voile or polyester habotai.
Press every seam as soon as you sew it, before you cross it with another seam. Use a pressing ham for the princess seams and darts, and a pressing cloth on the right side to avoid shine.
Sewing steps
Sew with right sides together and a 1 cm (3/8″) seam allowance unless stated otherwise. Before step 1, fuse the interfacing to the main-fabric pieces (all except the sleeves) and staystitch the neck edges of the center fronts (2) and center backs (4) 0.8 cm from the edge so they cannot stretch.
- Sew the darts. On the wrong side of each center front (2), mark the dart legs and the dart point. Fold the dart right sides together so the legs lie on top of each other, and pin. Stitch from the princess seam edge to the point, finishing exactly at the fold. Do not backstitch at the point: leave long threads and tie them. Press the dart down towards the hem over a pressing ham.
- Sew the front princess seams. Pin a side front (3) to a center front (2), matching the notches. Ease the curved edges together without stretching them. Stitch, then clip the curved seam allowances every 1 to 1.5 cm, up to but not through the stitching. Press the seam open over a ham and finish the seam allowances. Repeat for the other front.
- Sew the back. Sew the two center backs (4) together along the center back edge, finish and press open. Sew a side back (6) to each side of the back, matching the notches, the same way as the fronts. Clip, finish and press open.
- Sew the shoulder and side seams. Place the fronts on the back, right sides together. Sew the shoulder seams, then the side seams, matching the notches. Finish and press the seams open. This is the outer shell of the shirt. Optional: tack thin shoulder pads to the shoulder seam allowances now.
- Make the collar. Place the two collars (13), both interfaced, right sides together. Stitch the two short ends and the long outer edge, leaving the neck edge (the inner curve with the notches) open. Trim the seam allowances to 0.5 cm, cut the corners diagonally, turn right side out and push the points out with a point turner. Press, rolling the seam very slightly towards the under collar. Baste the open neck edges together 0.8 cm from the edge and keep the notches visible.
- Make the lining and facing unit. On the center back lining (5), fold the center back pleat along its lines, towards one side, and baste across the top and bottom edges. Sew a side back lining (7) to each side of the center back lining and press. Sew a front neck facing (11) to the front edge of each front lining (1), right sides together, matching the notches. Sew the back neck facing (12) to the neck edge of the back lining, matching the center back. Press the seams towards the lining. Sew the lining unit front to back at the shoulders and side seams. In one side seam, leave a 15 cm (6″) opening unsewn, with a backstitch at both ends: you will turn the shirt through it later.
- Sew the sleeves. On each sleeve (8), sew two rows of long machine stitches inside the seam allowance between the notches on the cap (the EASE area), without backstitching. Fold the sleeve right sides together and sew the underarm seam. Finish and press open, and leave the hem edge raw: it will be finished with the cuff. Turn the shell wrong side out and the sleeve right side out, and slide the sleeve into the armhole, right sides together. Match the top notch to the shoulder seam, the underarm seams, the single and double notches and the dots. Gently pull the ease threads so the cap fits the armhole without tucks, pin closely and stitch with the sleeve on top. Stitch again 0.5 cm away in the allowance, trim and finish, then press the allowance towards the sleeve.
- Sew the lining sleeves. Sew the sleeve linings (9) the same way: ease the cap, sew the underarm seam and set them into the armholes of the lining unit, matching the notches. Press the seams. The lining is now a complete second shirt without a collar.
- Attach the collar and the facings. With the shell right side out, pin the collar to the neckline, under collar against the right side of the shell, matching the collar notches to the shoulder seams and center back. The collar ends finish at the front edges. Baste. Place the lining and facing unit over the shell, right sides together, so the facings lie on the fronts and the collar is sandwiched in between. Match the shoulder seams, notches and neck edges, and tuck the sleeves out of the way. Stitch from the bottom of one front edge up to the neck, along the neckline and down the other front edge, stopping the front-edge stitching 1 cm above the bottom edge of the facing. Grade the seam allowances, trimming the facing side narrower, clip the neck curve and the collar seam, and trim the corners at the top of the fronts.
- Sew the front hem corners. At the bottom of each front, fold the facing back against the shell, right sides together. The lower edge of the facing meets the hem fold line of the shell, 4 cm (1 5/8″) above its cut edge. Stitch across the bottom of the facing 1 cm from its edge, up to where the facing meets the lining. Trim the corner, turn the facing to the inside and push the corner out. Press the front edges so the seam rolls just to the inside.
- Close the lining at the hem and turn. Press the 4 cm (1 5/8″) hem allowance of the shell up to the wrong side along the fold line, all around between the facings, then unfold it. Pin the lower edge of the lining to the raw edge of the shell hem allowance, right sides together, matching seams, and stitch 1 cm from the edge from facing to facing. Pull the whole shirt right side out through the opening in the lining side seam. Fold the hem back up: the lining now makes a small soft fold just above the hem, which gives room to move. Press the hem, the front edges and the collar. At the side and princess seams, hand-tack the hem allowance to the seam allowances so it stays in place. Close the opening in the lining side seam by edgestitching or with a ladder stitch.
- Make the sleeve hem and bound slit. Smooth each sleeve lining inside its sleeve. Match the underarm seams and the slit lines and baste the lower edges of the sleeve and lining together, wrong sides together, 0.5 cm from the edge. From now on treat them as one layer. Cut along the slit line through both layers. Spread the slit open into a straight line, pin an edging strip (14) along it, right sides together, and stitch with a 0.7 cm (1/4″) allowance. At the top of the slit the sleeve allowance narrows to a few threads: take care not to make a pleat. Press the edging over the seam allowance, fold its other long edge under by 0.7 cm and stitch it down close to the fold, from the inside or by hand. Fold the bound slit so the front side folds under, and stitch a short diagonal line across the top of the binding on the inside.
- Fold the sleeve pleats. On each sleeve, fold the two pleats at the hem: bring the line at the tail of each arrow to the line at its tip. Check that the sleeve hem now matches the length of the cuff stitching line, the cuff without its button overlap. Baste the pleats in place across the lower edge.
- Sew the cuffs. Press the interfaced cuff (10) in half lengthwise along the fold line, wrong sides together, then press the seam allowance of one long edge to the wrong side. Pin the other long edge to the sleeve hem, right sides together, with the ends of the cuff extending 1 cm beyond the slit edges, and stitch. Fold the cuff right sides together along the fold line and stitch the two ends. Trim, turn right side out and press. Bring the pressed edge over the seam allowance on the inside, just covering the stitching, and slipstitch it by hand or stitch in the ditch from the right side. Edgestitch around the cuff if you like.
- Make the buttonholes and sew the buttons. Make six horizontal buttonholes on the right front, as worn, at the marks: each starts 0.3 cm beyond the center front line towards the front edge and is 1.8 cm (11/16″) long for a 1.5 cm button. Overlap the fronts, matching the center front lines, mark the button positions through the buttonholes and sew the buttons on the left front. Make a small buttonhole on the top end of each cuff and sew the small button on the under end. Give the whole shirt a final press, using a cloth on the right side.
Tips and common mistakes
Test on a scrap. Check the stitch length, the interfacing, which should not bubble or change the look of the fabric, and a buttonhole on two interfaced layers before you start.
Read steps 9 to 11 first. Attaching the collar between the shell and the facing and lining unit, and then closing the lining at the hem, is the trickiest part. Read those steps once before you start.
The collar and back pieces are cut as drawn. The center back lining, back neck facing and collar carry a FOLD label that marks the center back only. Cut them from a single layer, not on the fold of the fabric.
Press as you go. A neat press at each stage is what gives the collar and the front edges their crisp, tailored finish.
How to style the Princess Seam Shirt
Office: with high-waisted wide-leg trousers or a pencil skirt for a polished look.
Tucked in: into a midi skirt with a belt.
Layered: worn open over a fitted top or a fine knit as a light jacket.
Another button-front piece to sew: try our maxi shirt dress sewing pattern or the button front vest sewing pattern.
Care
Wash according to the most delicate fabric, main or lining, inside out, on a gentle cycle. Close the buttons before washing to keep the front in shape, and press on the wrong side or with a pressing cloth.
Questions
Is seam allowance included?
Yes: 1 cm (3/8″) on every piece, except the edging strips (0.7 cm / 1/4″ on the long edges), and a 4 cm (1 5/8″) hem allowance on the body.
Which paper sizes are included?
The free download comes in A4 and US Letter, as a printable PDF with one file per size, XXS to 4XL (US 00–22).
Which size should I choose?
Choose by your bust, using the body measurement table, and check the finished measurements to see the ease. If your waist or hips fall in a different size, blend between sizes along the princess and side seams.
What fabric is best for a fitted shirt?
A medium-weight woven with some body: cotton twill, cotton sateen, firm poplin, a linen blend or light wool suiting. A woven with 2 to 4 % elastane is the most comfortable. Use a smooth, light lining such as cupro, viscose lining or cotton voile.
How much fabric do I need?
About 1.5 to 1.9 m of 150 cm wide main fabric (1.9 to 2.2 m of 115 cm wide fabric), 1.2 m of 150 cm wide lining and 1.9 to 2.1 m of fusible interfacing, depending on your size. See the fabric table above.
How many buttons do I need?
Six buttons of 1.5 cm (5/8″) for the front and two small buttons of 0.5 cm (1/4″) for the cuffs, the same number in every size.
How do I lengthen or shorten the shirt?
The pattern is drafted for 168 cm (5′6″). Lengthen or shorten every body piece, lining and the front facing by the same amount at waist level, and change the sleeve and sleeve lining halfway between the underarm and the slit.
Is this shirt pattern good for beginners?
It is rated intermediate. The lining, the collar and the bound sleeve slits ask for some care, but each step is explained in order. Read steps 9 to 11 before you start.
Happy sewing!
Love our free patterns? Buy us a coffee to keep them coming, or simply share, pin and comment. Thank you!
 Support me on Ko-fi